- A developer registers an account with the Tyk Developer Portal and uses the portal to create a new client.
- Tyk sends a request to the , in this case The Curity Identity Server. The IDP replies with the Client ID and Secret.
- Using the provided Client ID and Secret, the developer (or an application) can initiate an Authorization flow to obtain an Access Token from The Curity Identity Server.
- The developer (or the application) can then use the Access Token when calling an API exposed by Tyk. In the case when a JWT is used to protect the API, Tyk validates the token using the provided by The Curity Identity Server. The API can also be protected using the Split Token Approach.
Requirements
- An installation of The Curity Identity Server. Follow the Getting Started Guide if an installation is not already available.
- A Tyk Self-Managed installation (Gateway + Dashboard).
Enable DCR in The Curity Identity Server
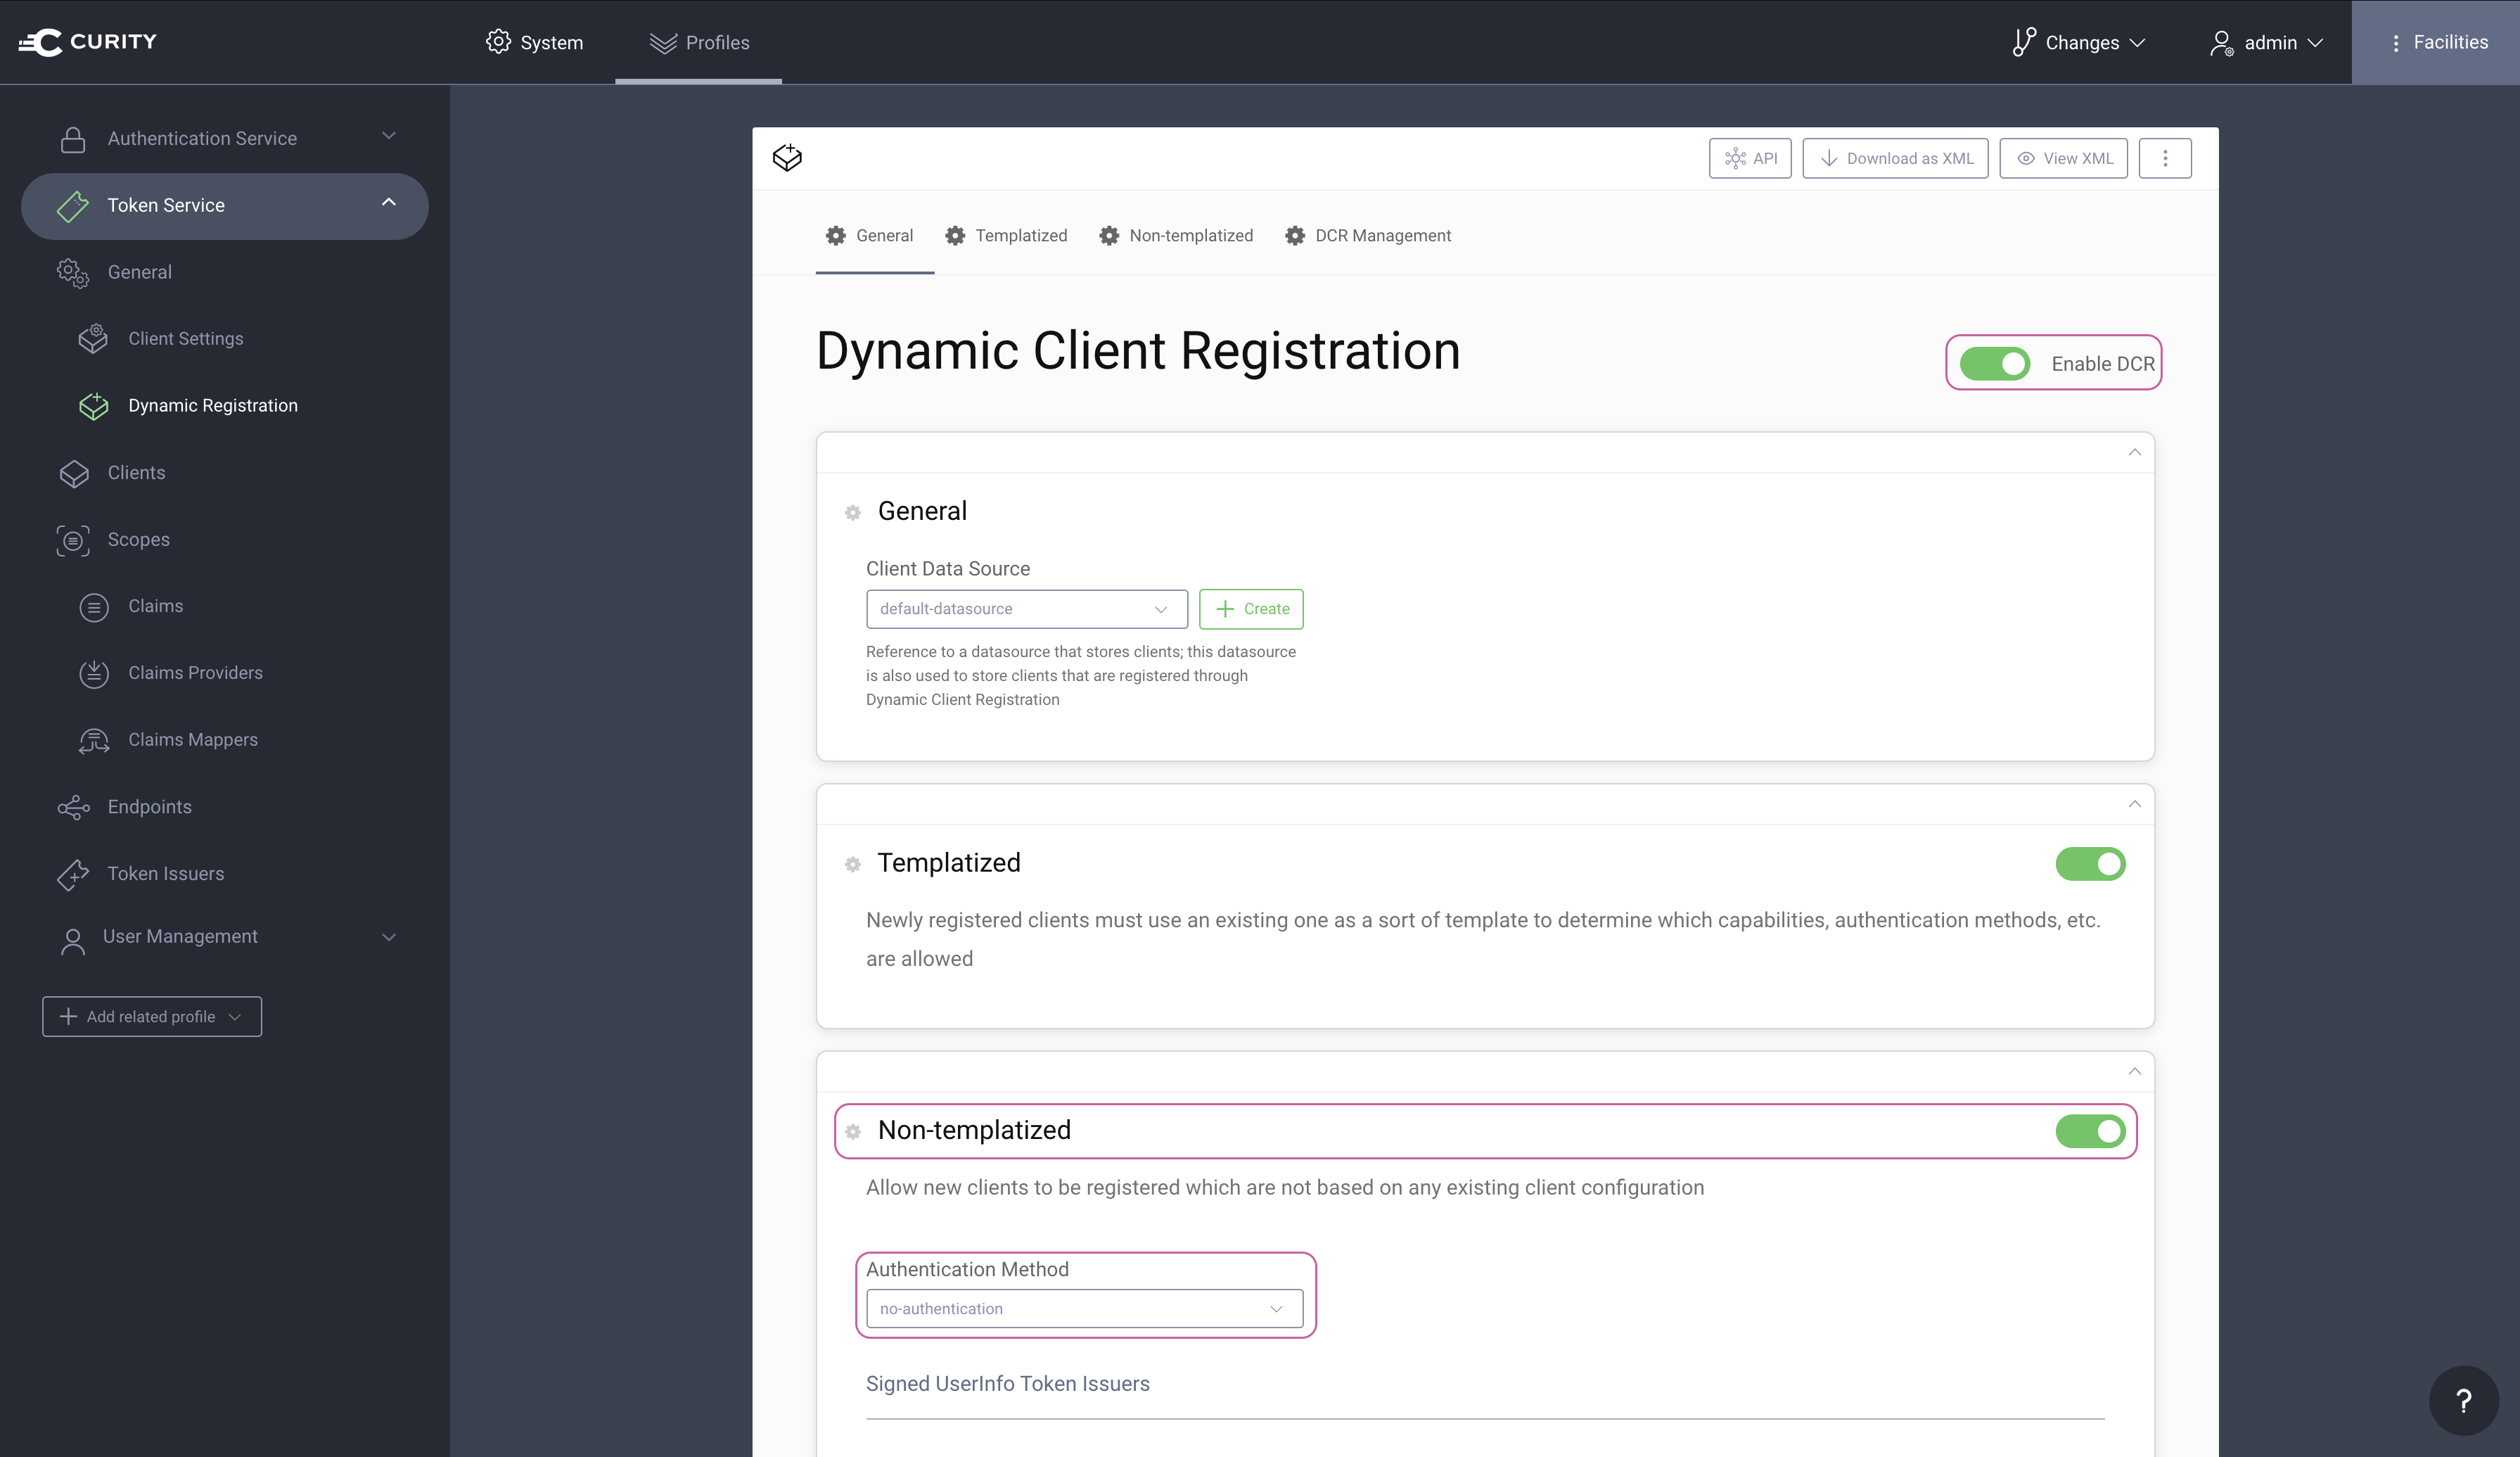
By default, DCR is not enabled in The Curity Identity Server. In the Admin UI, go to Profiles → Token Service → General → Dynamic Registration. Set both Enable DCR and Non-templatized to enabled and set the Authentication Method tono-authentication.
Commit the changesRemember to Commit the changes by going to Changes → Commit.
Setting up Tyk
First checktyk_analytics.conf and make sure that a proper oauth_redirect_uri_separator parameter is set. This sets the character that separates multiple redirect uri’s to ;.
tyk_analytics.conf, remember to restart the service to apply the change.
Create DCR proxy API
The Curity Identity Server requires a token with adcr scope in order to authenticate the DCR endpoint. A workaround is to configure the DCR endpoint to use no-authentication. A proxy API can be configured in such a way that Tyk will proxy the DCR request to the Curity Identity Server and a static token used to authenticate the DCR proxy API.
In the Tyk Dashboard, navigate to System Management → APIs. Create a new API and give it the name, dcr. Make sure the API Listen Path is set to /dcr/.
Set the Target URL to the DCR endpoint of the Curity Identity Server (Ex. https://idsvr.example.com/token-service/oauth-registration).
In the Authentication section, set Authentication Mode to Authentication Token.
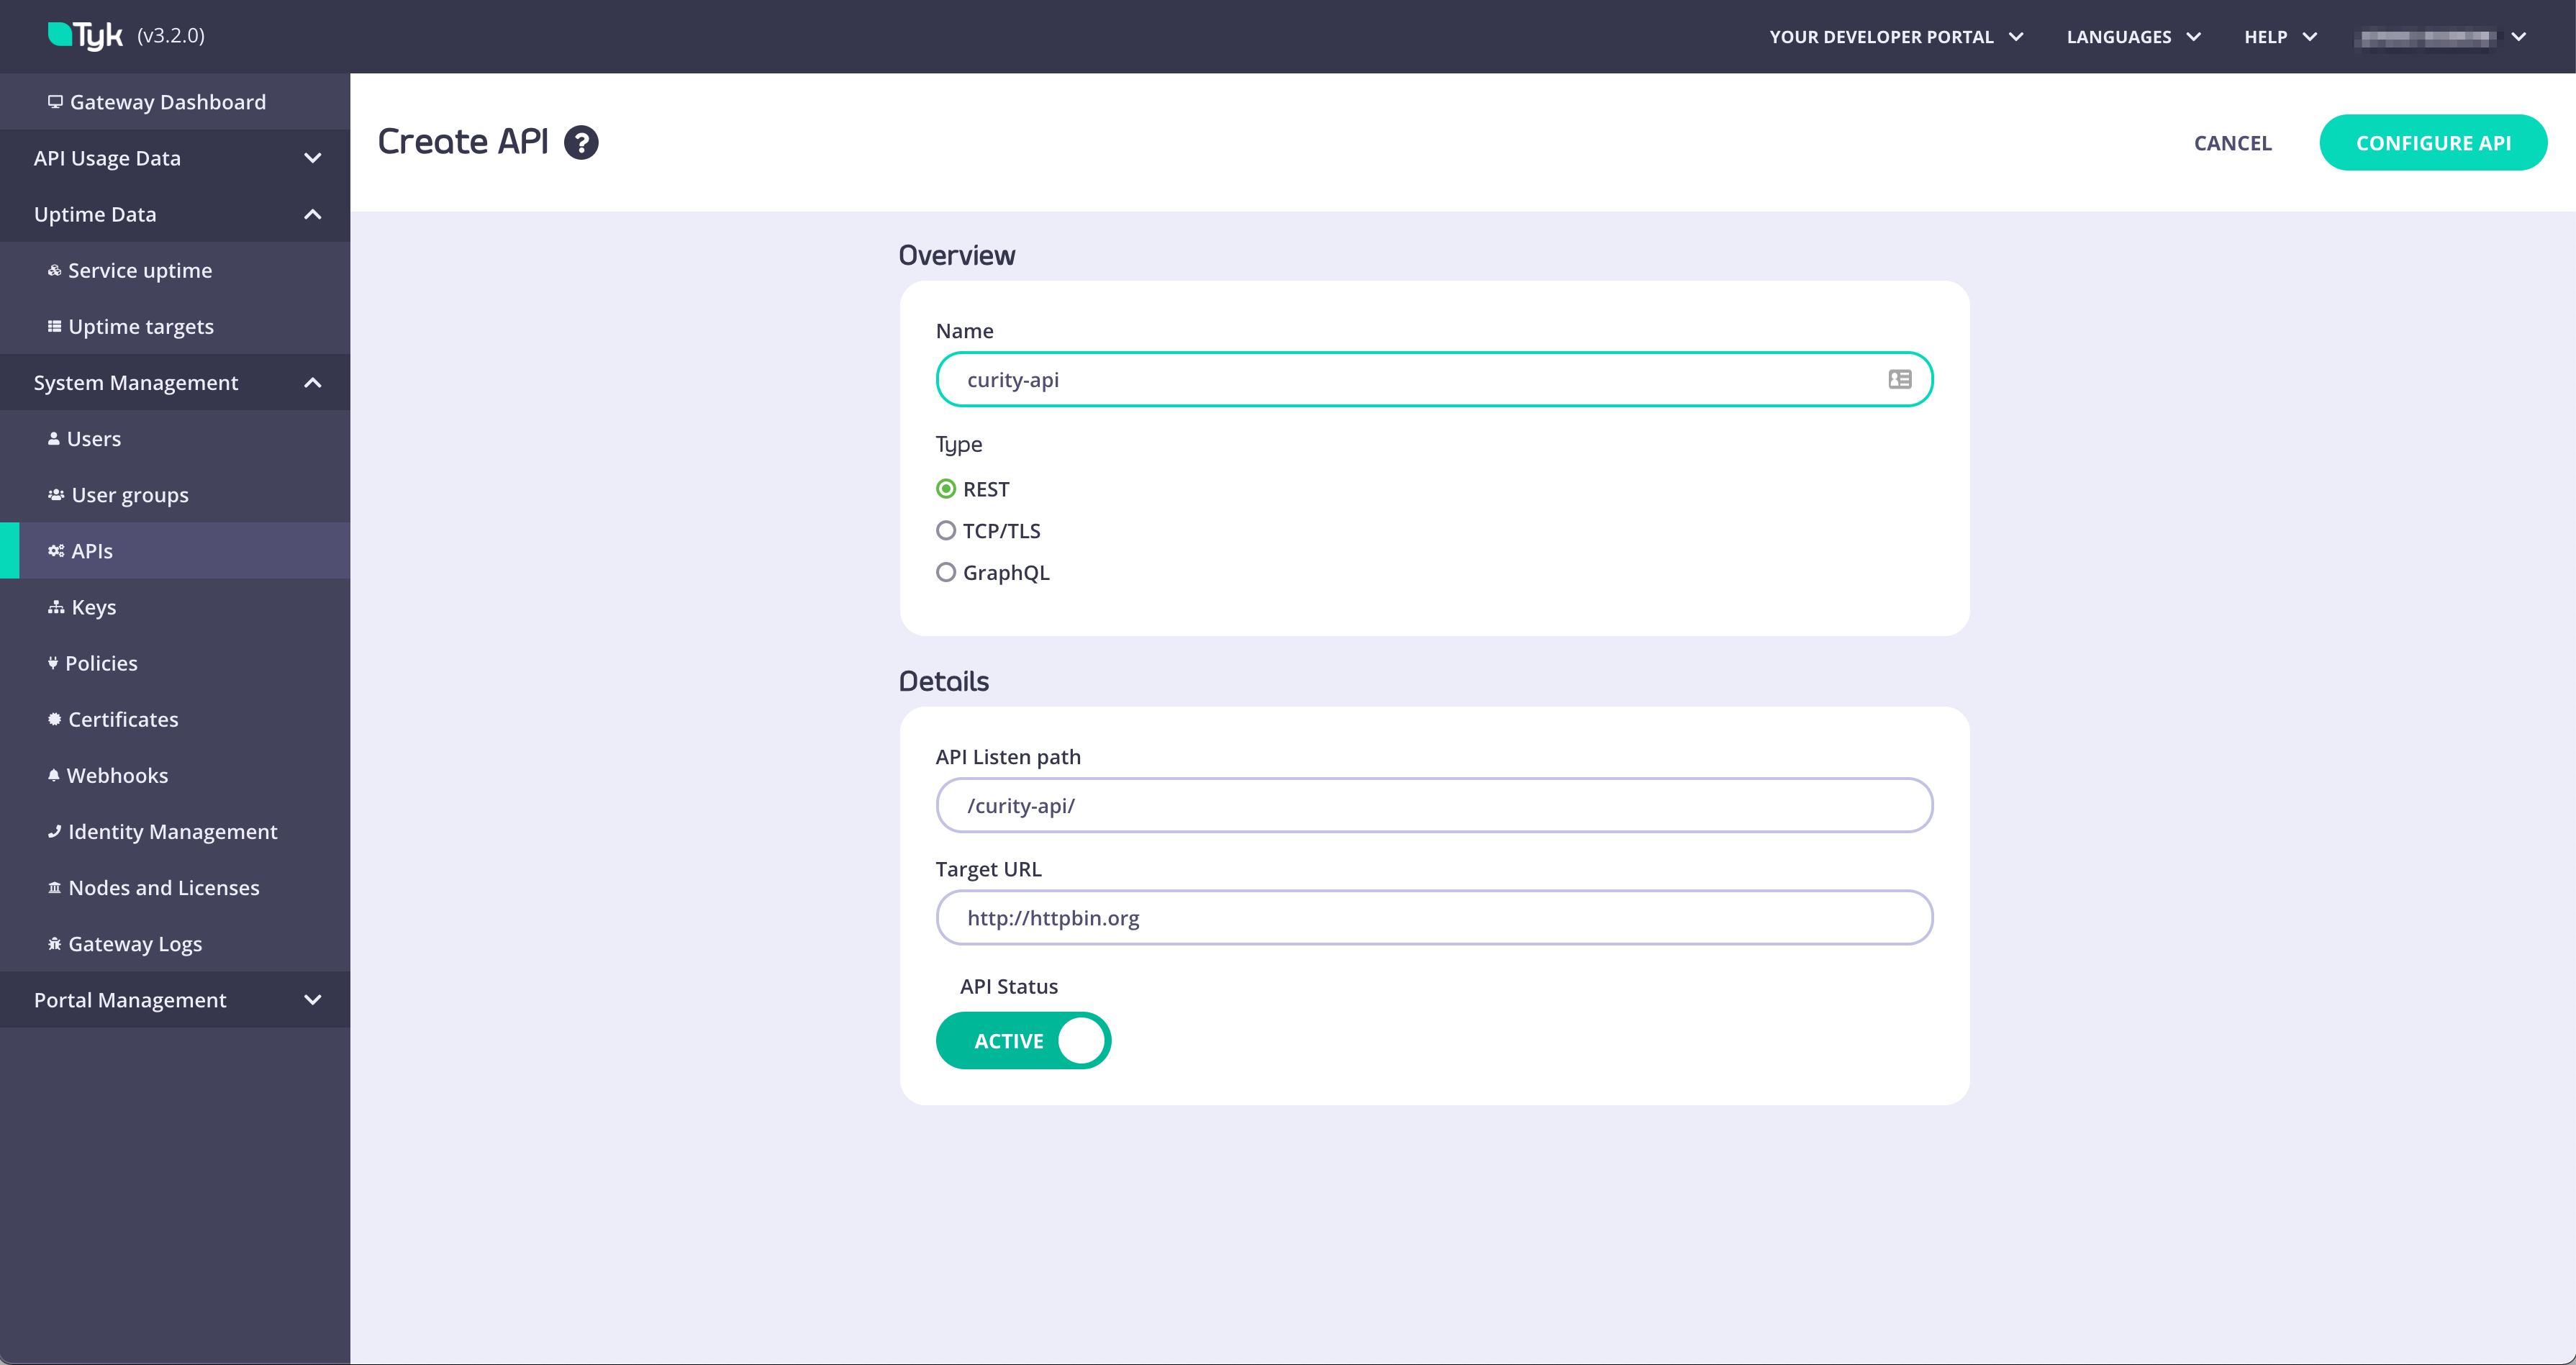
Create an example API
In the Tyk Dashboard, navigate to System Management → APIs. Create a new API and give it the name, ex.curity-api:
- Split Token Approach - This would be the preferred option and is fully detailed in the split-token-tyk GitHub repository with examples. The basics of this approach is that Tyk proxies the IDP’s token endpoint and splits the token to only return the signature of the JWT instead of the complete JWT. The client calling the API will use the signature as an opaque token in the Authorize header. Tyk will then look up the complete JWT using the signature as the key and then add the complete JWT to the Authorization header in the request to the upstream API.
- JWT Approach - This approach means that the IDP issues a JWT to the client (using the dynamically registered client) and the complete JWT is sent in the Authorization header in the API request to Tyk. Although this is absolutely a viable approach there are some potential risks with issuing JWTs to public clients since they could contain Personal Identifiable Information (PII).
- Split Token Approach
- JWT Approach
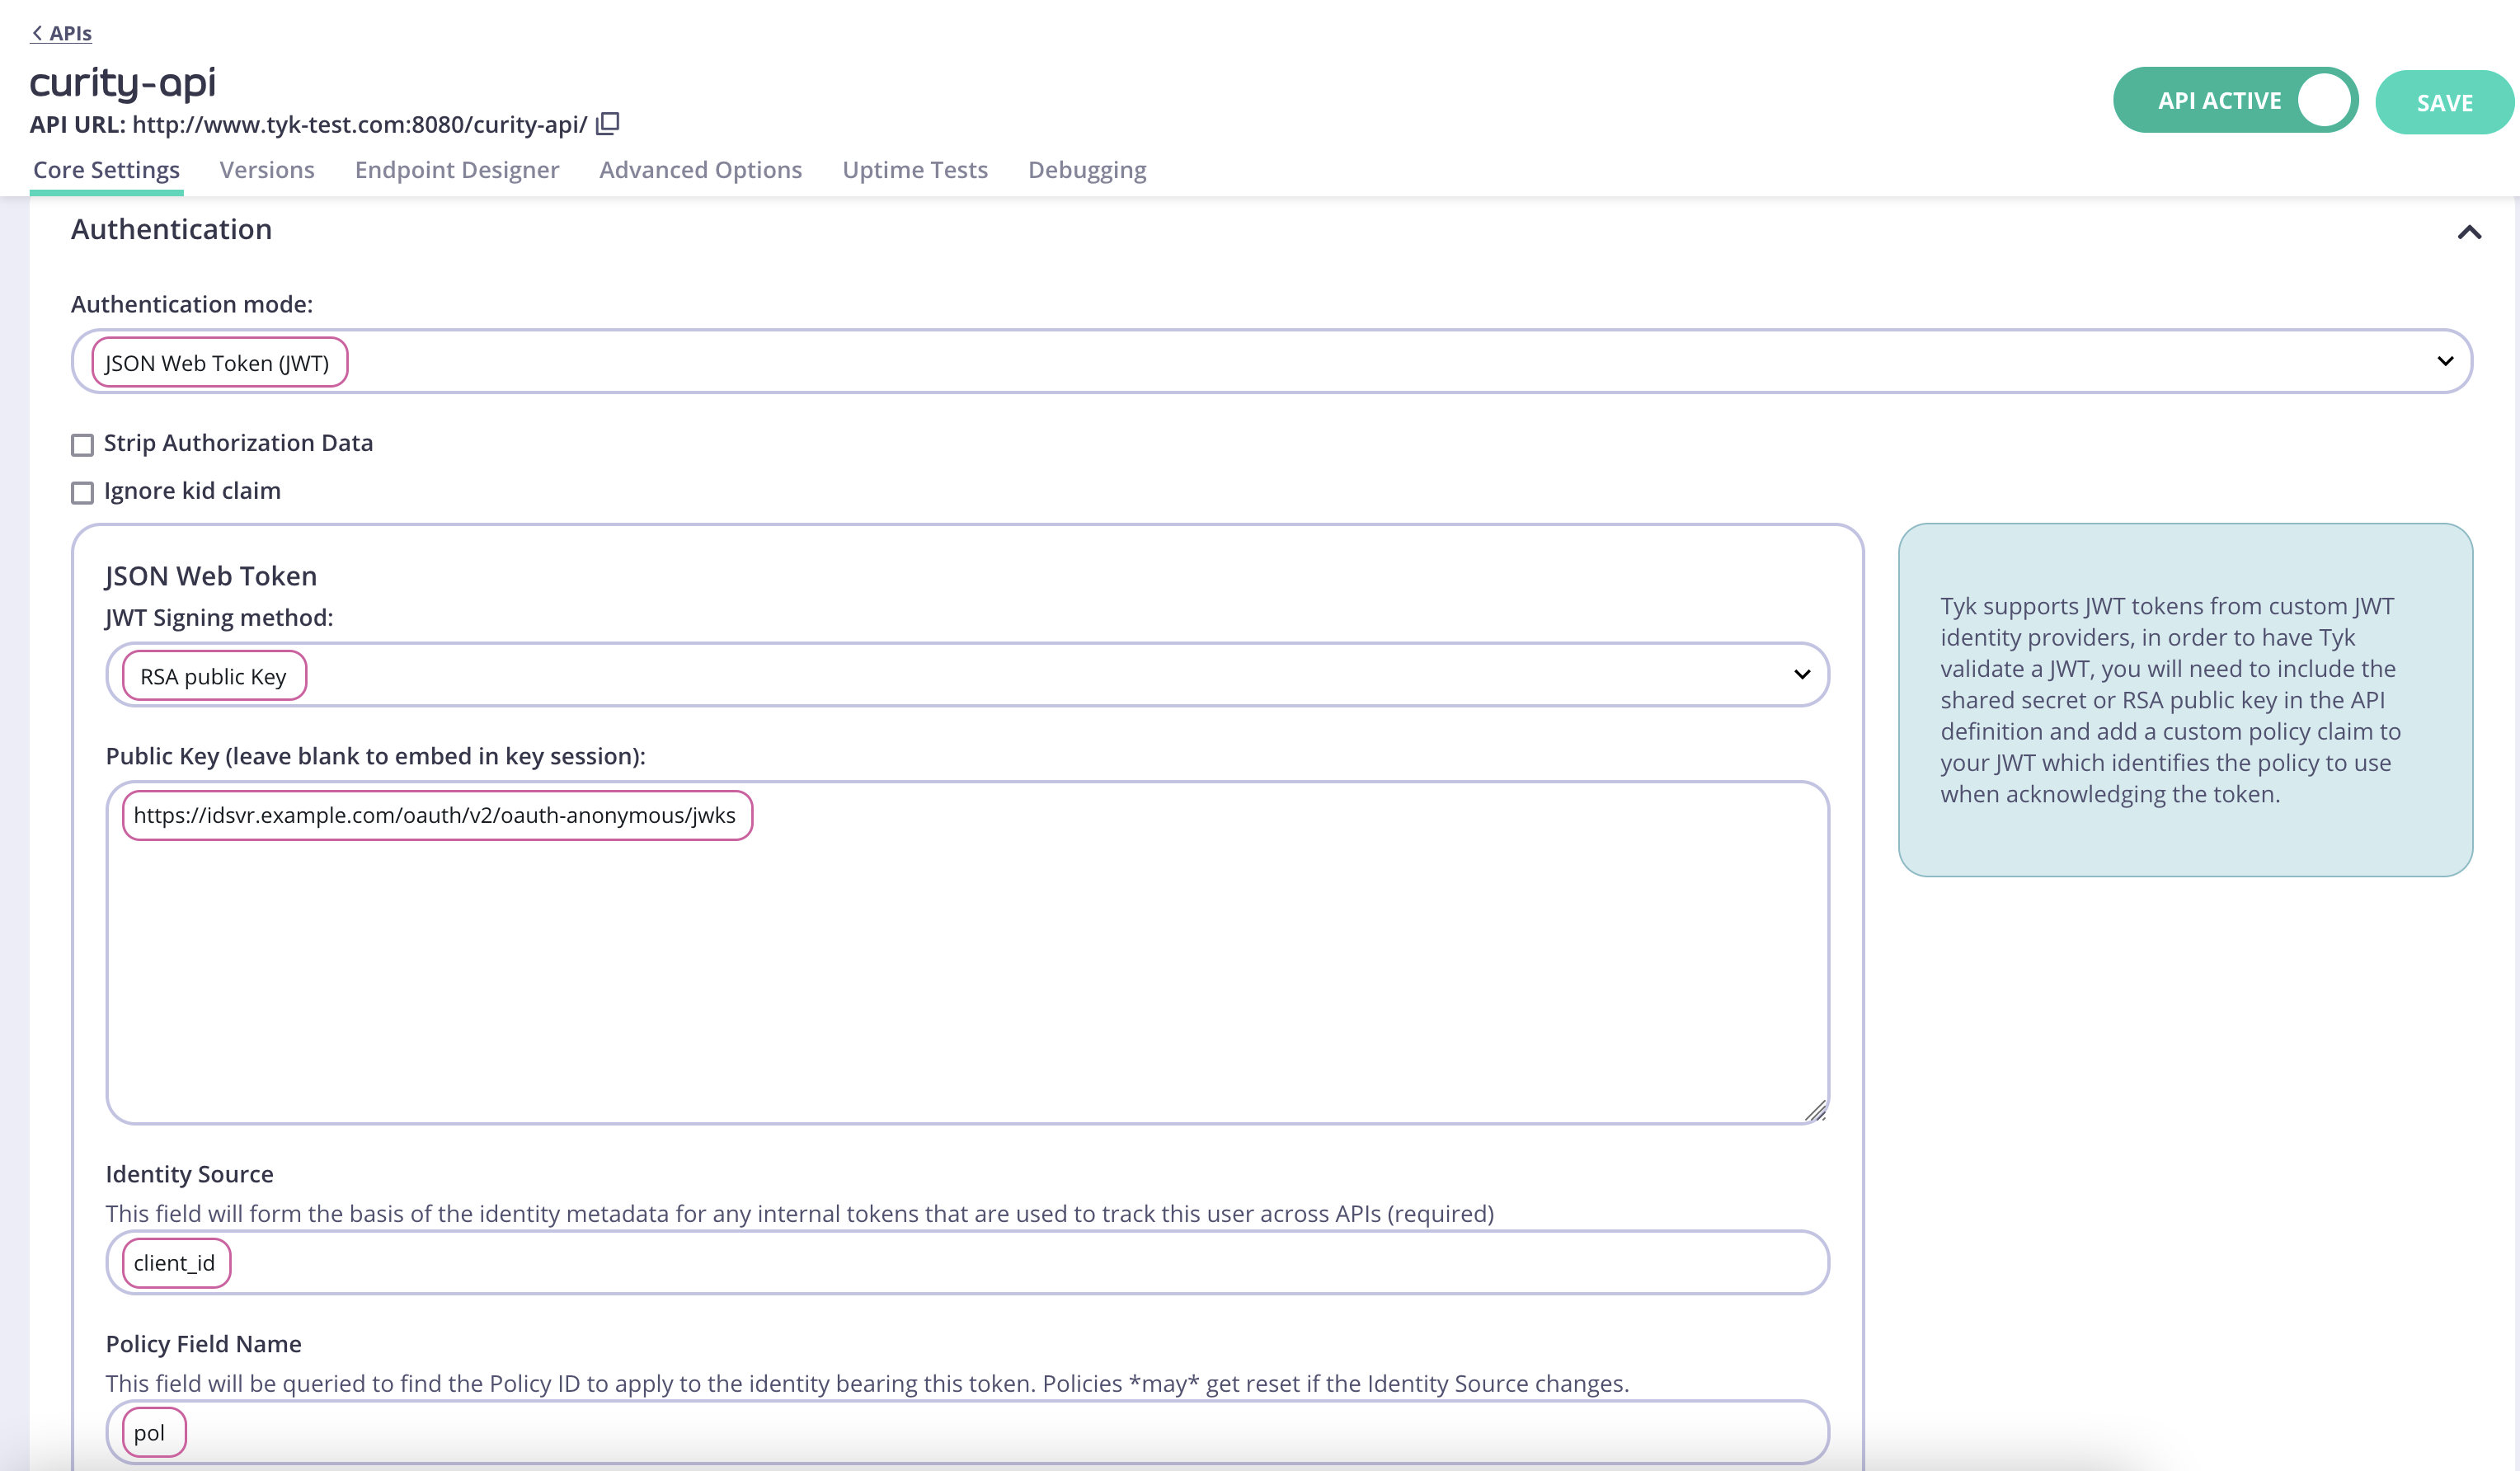
The configuration of the Split Token Approach is outlined in the readme in the GitHub repository. Make sure to follow the instructions to configure Tyk to handle the Split Token Approach before continuing.For the Split Token Approach, configure the Authentication as outlined in the below screenshot for an example API.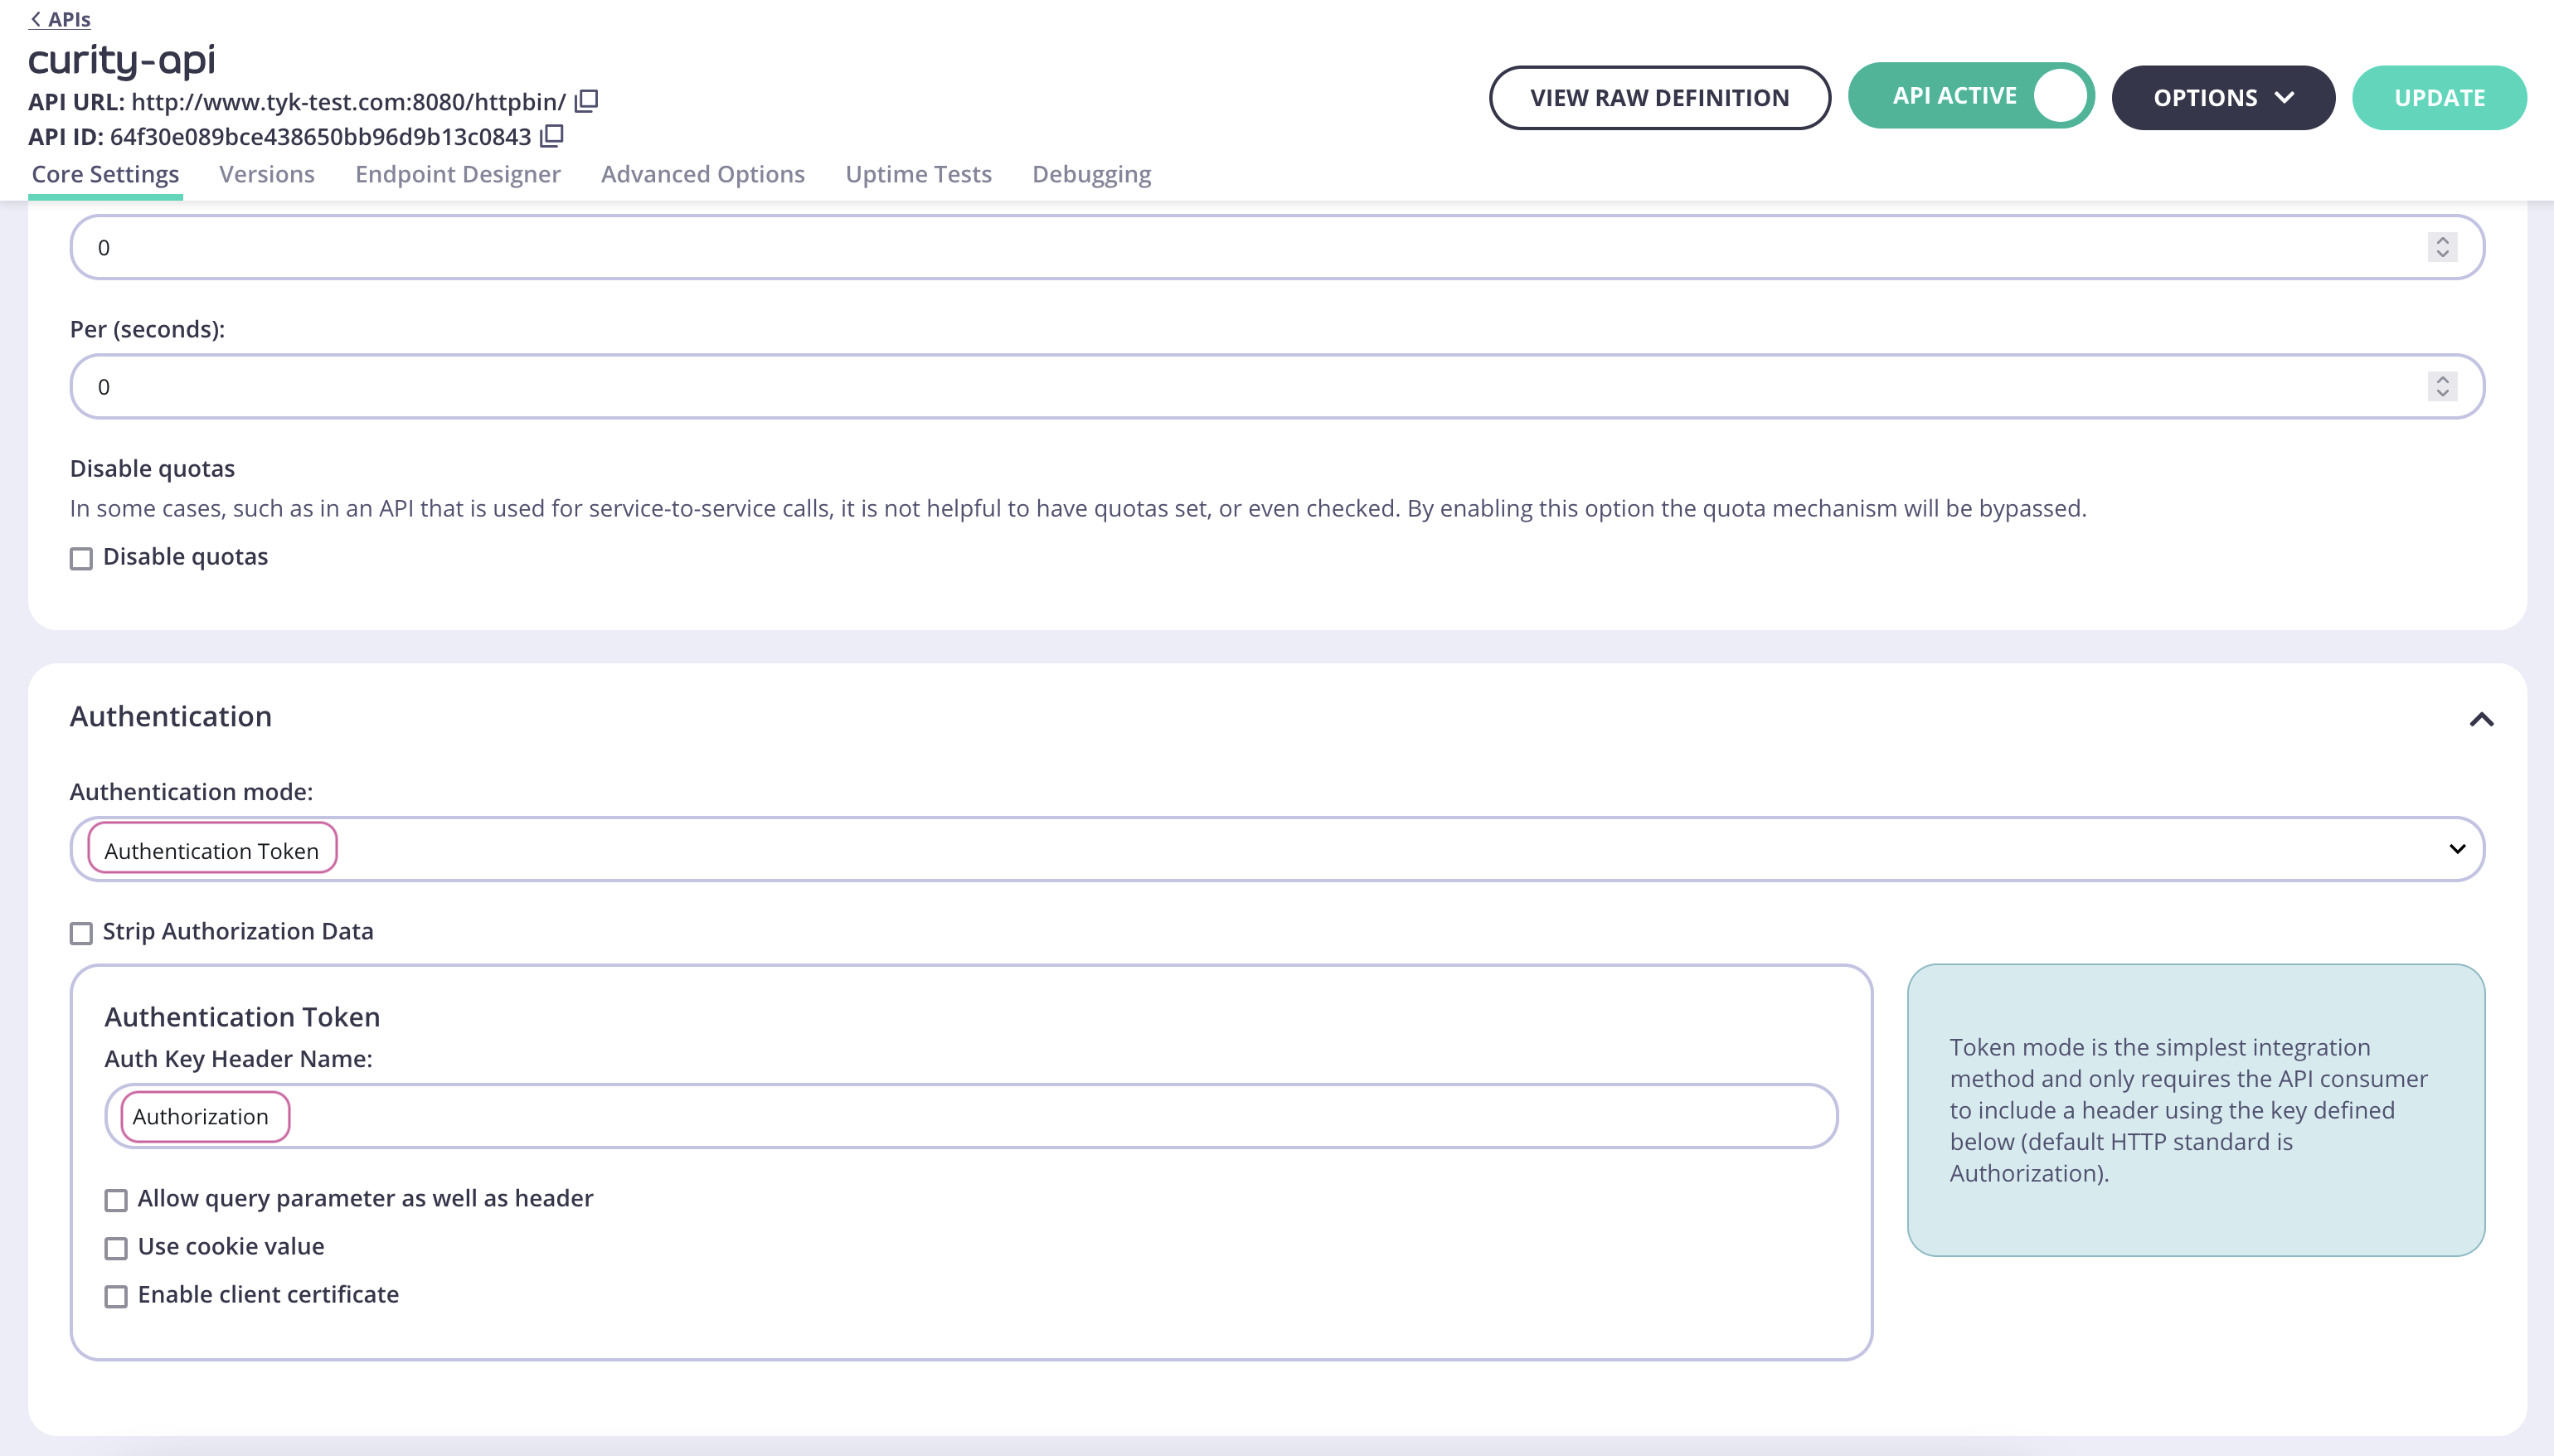


Create a facade API
The Tyk Gateway needs to make use of a facade API in order for the API to be published to the Developer Portal when protected with the Split Token Approach.In the Tyk Dashboard, navigate to System Management → APIs. Create a new API and give it the namefacade-oauth-registration.
Set the Target URL to http://httpbin.org.In the Authentication section, set Authentication Mode to JSON Web Token (JWT).Obtaining the JWKS URIThe JWKS URI can be obtained via the
.well-known/openid-configuration endpoint as it’s a required value. The below cURL command can get the "jwks_uri" value directly.Create and assign a policy
The Facade API needs a policy in order to be published to the Developer Portal.Switch to System Management → Policies. Click Add Policy and select the Facade API created previously (facade-oauth-registration) from the list. Then switch to the Configurations tab. Name the policy facade-policy. Select an expiry and click Create Policy.Navigate back to System Management → APIs, click facade-oauth-registration, scroll down to the Authentication section and select the newly created policy in the Default Policy setting. Click Update to save the changes.Create a Key for the DCR proxy
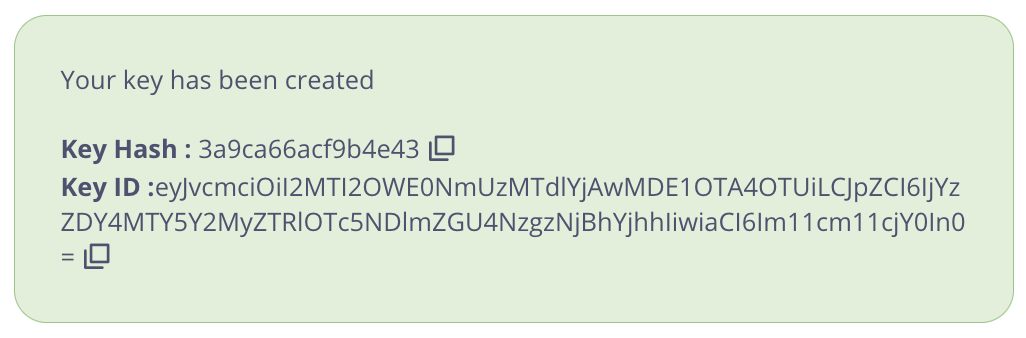
Navigate to System Management → Keys, clickAdd Key. Switch to the Choose API tab. Select the previously created DCR API. Under 2. Configurations give the key an alias and set an expiry. Then click Create Key.Publish the API to the Developer Portal
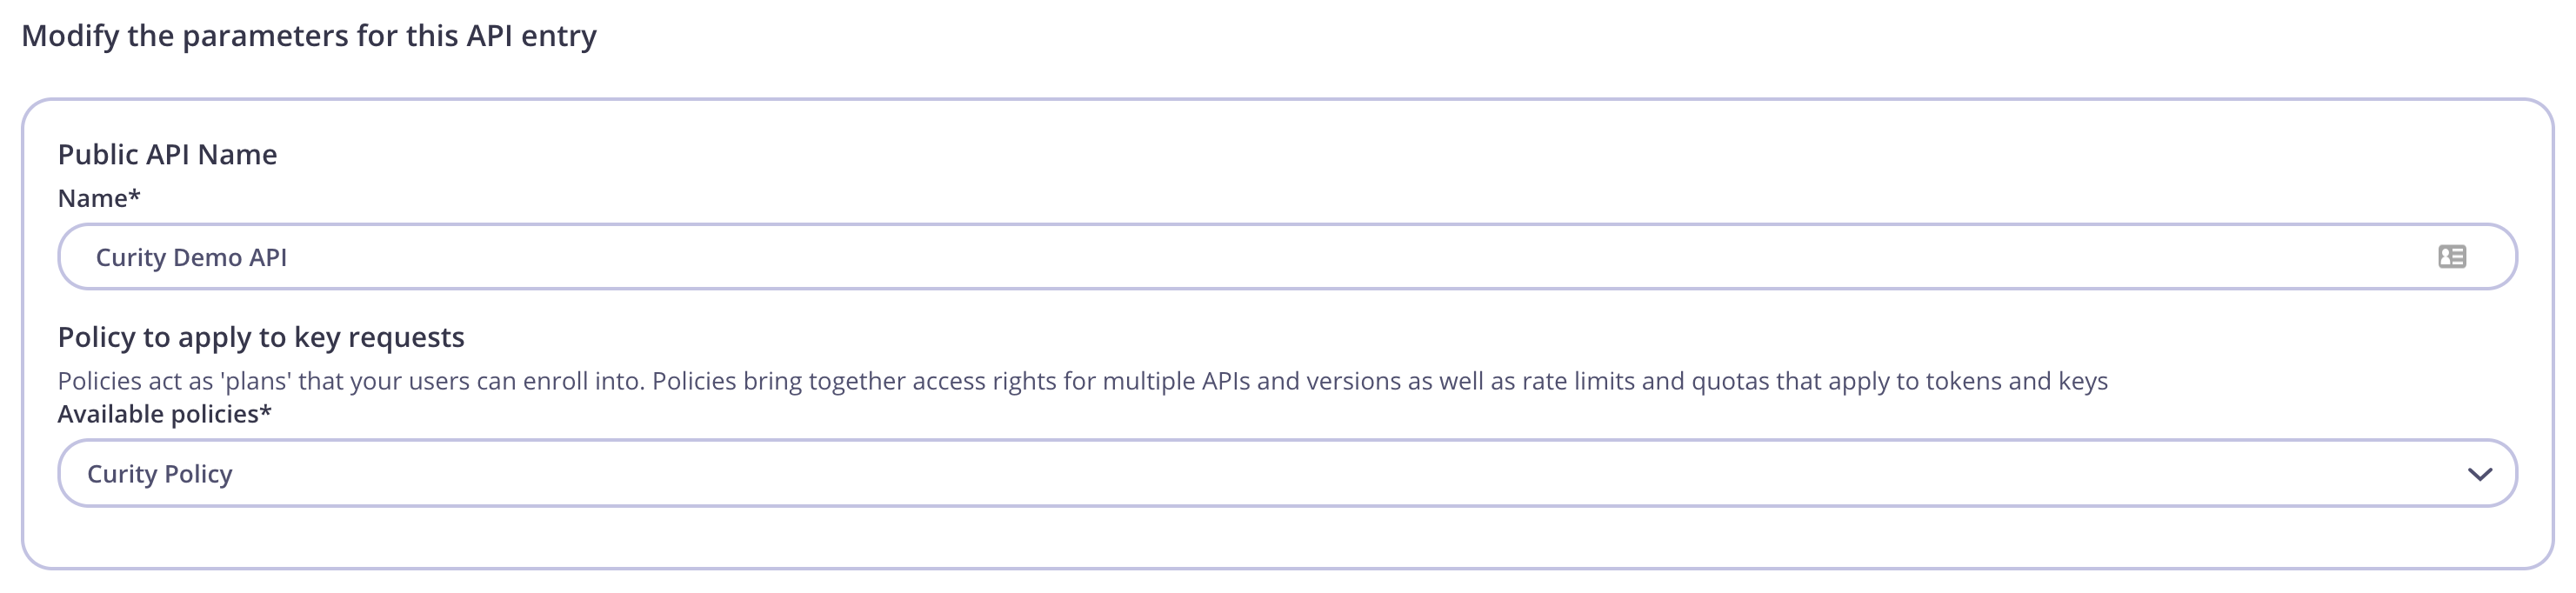
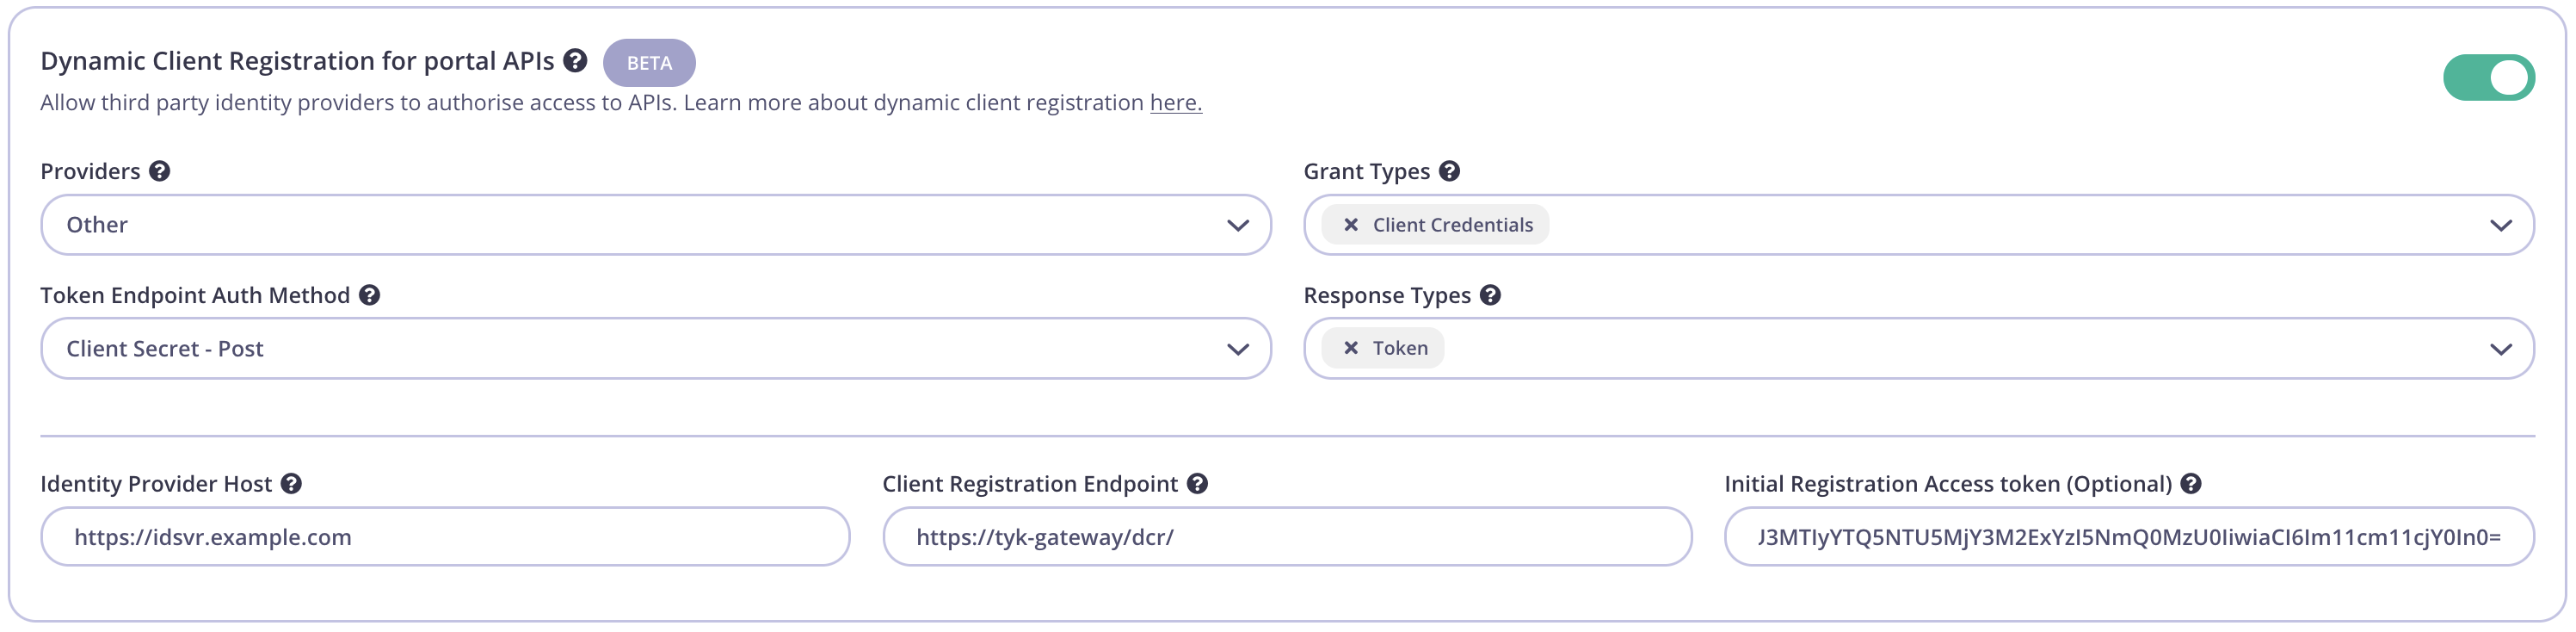
The API and the Facade API are now configured and can used to publish the API to the Tyk Developer Portal. Navigate to Portal Management → Catalog, then click Add New API. Give it a public name, ex.OAuth Facade API and select the facade-policy.Override global settings. Then scroll down to the Dynamic Client Registration for portal APIs section and toggle the switch to enable. Configure as pictured below:Testing the flow
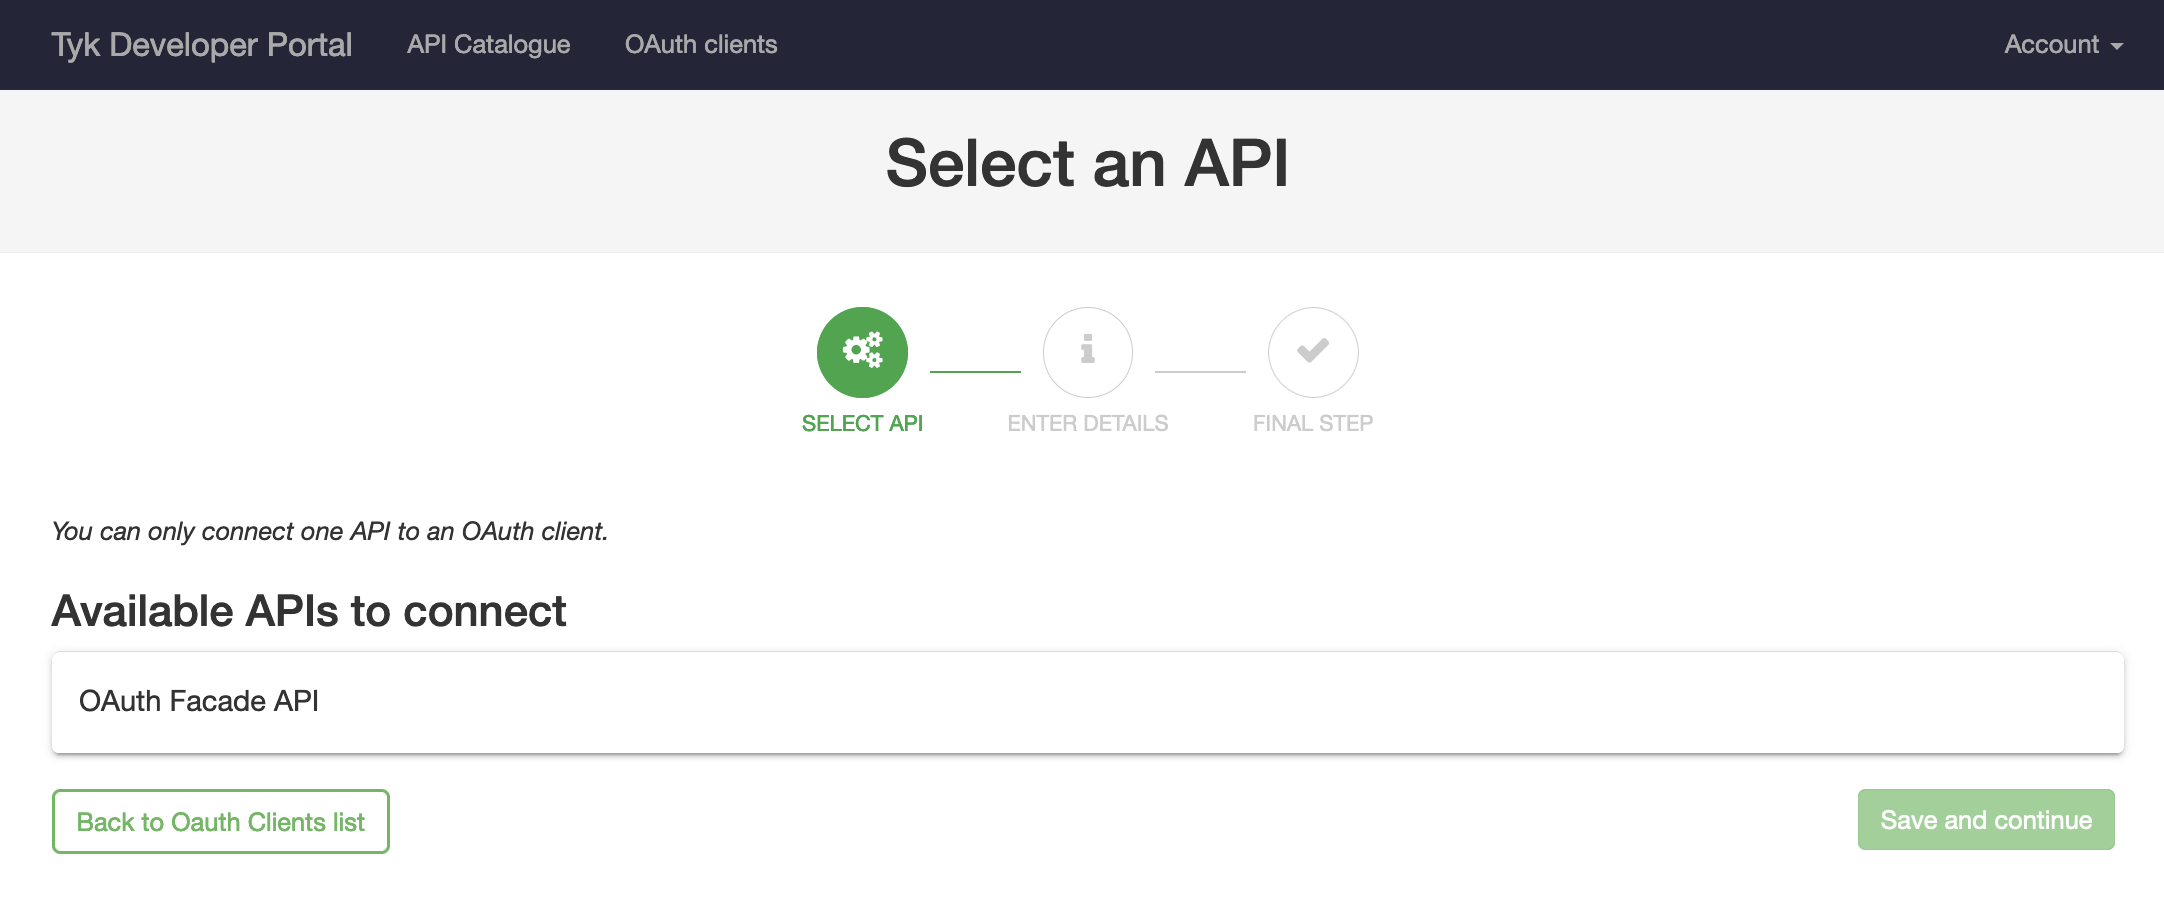
Tyk and The Curity Identity Server should now be configured and the flow to register an OAuth client using the Tyk Developer Portal can be tested.Create an OAuth Client
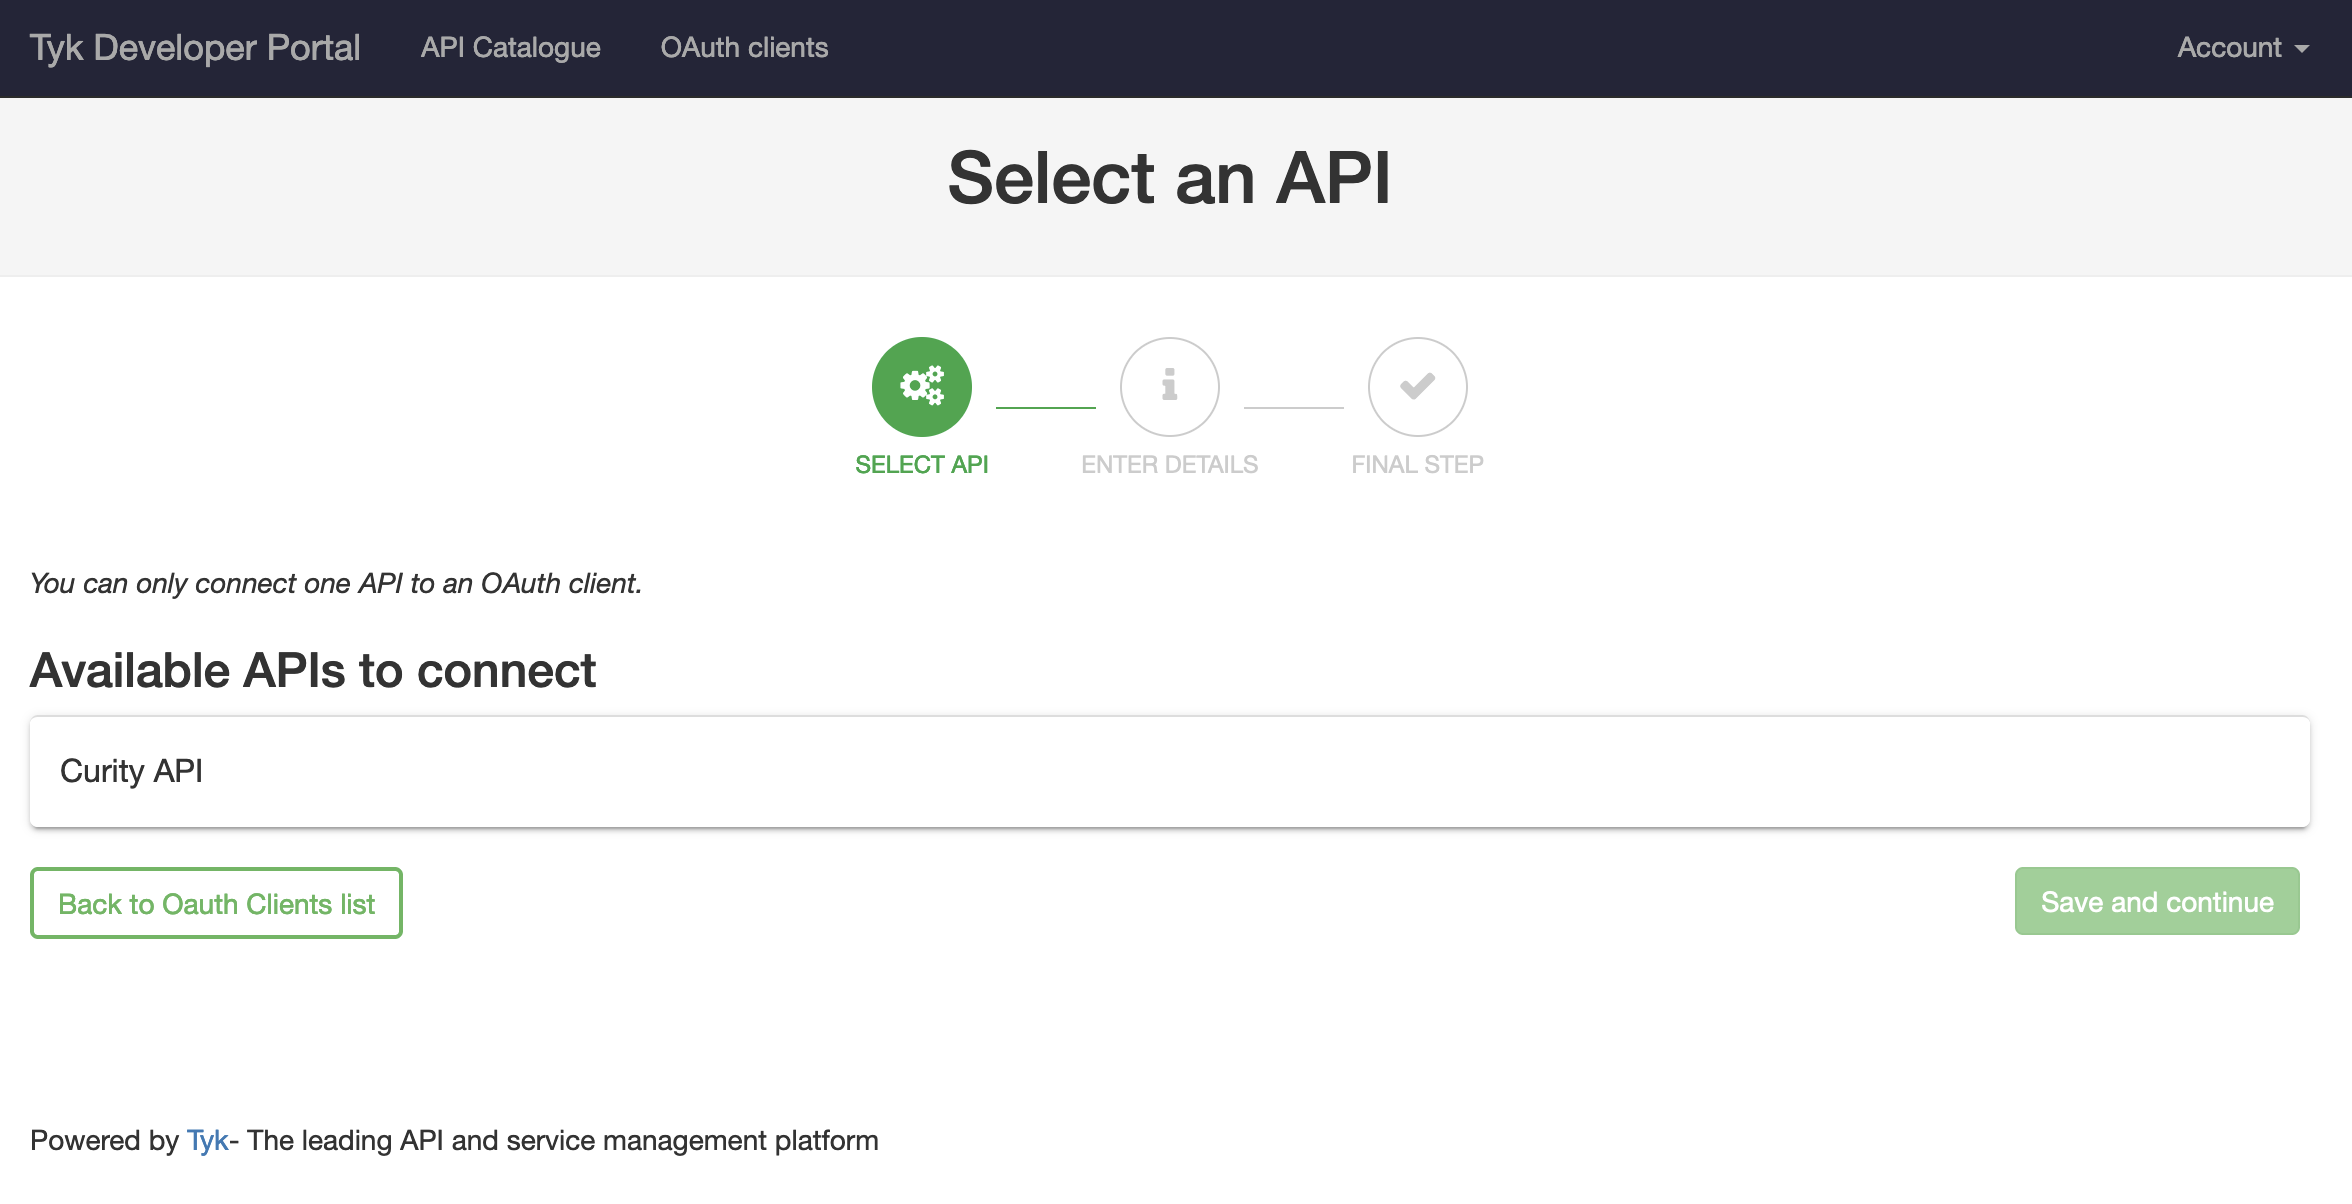
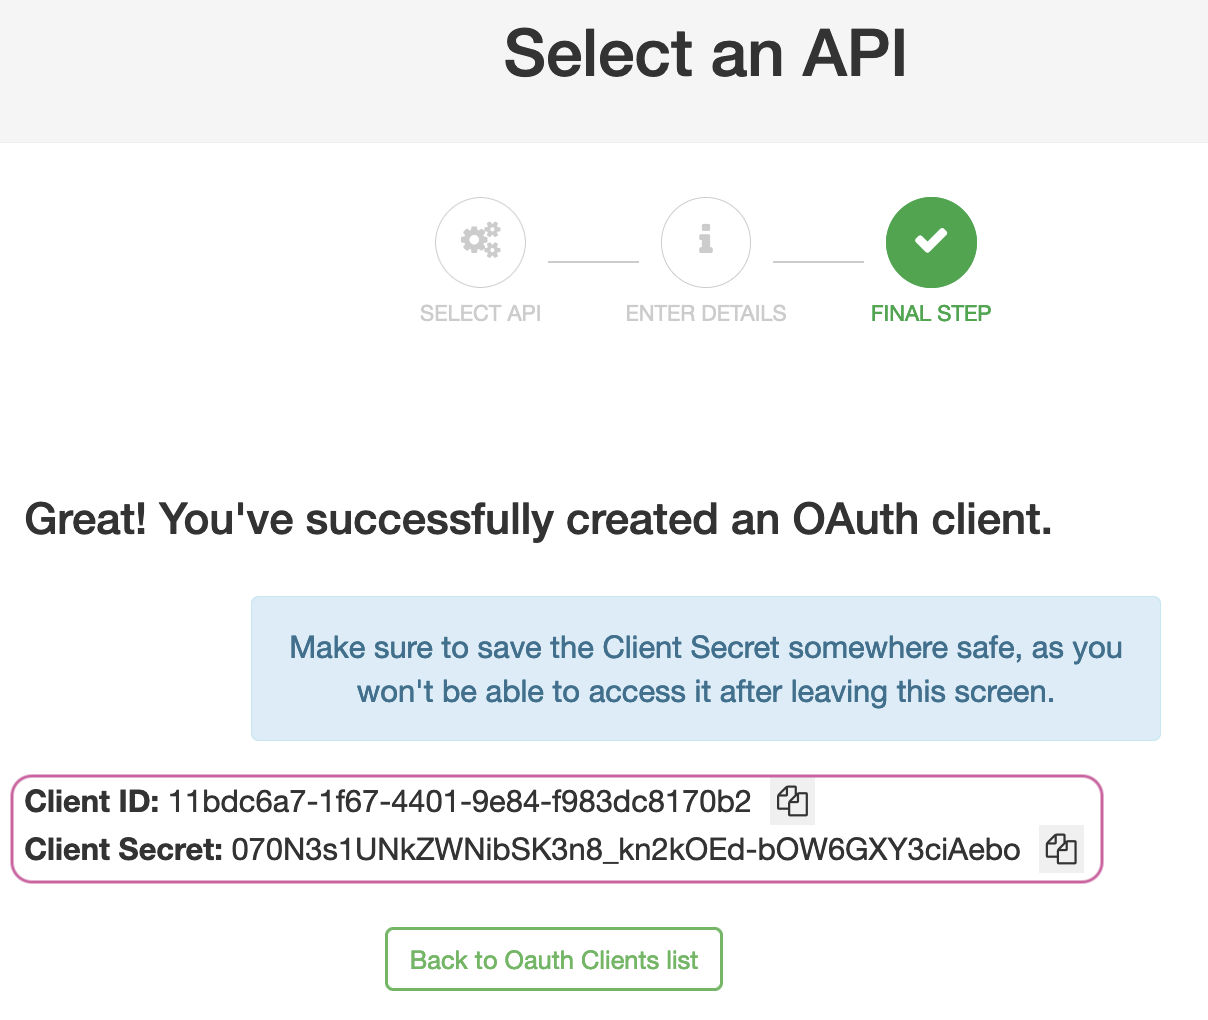
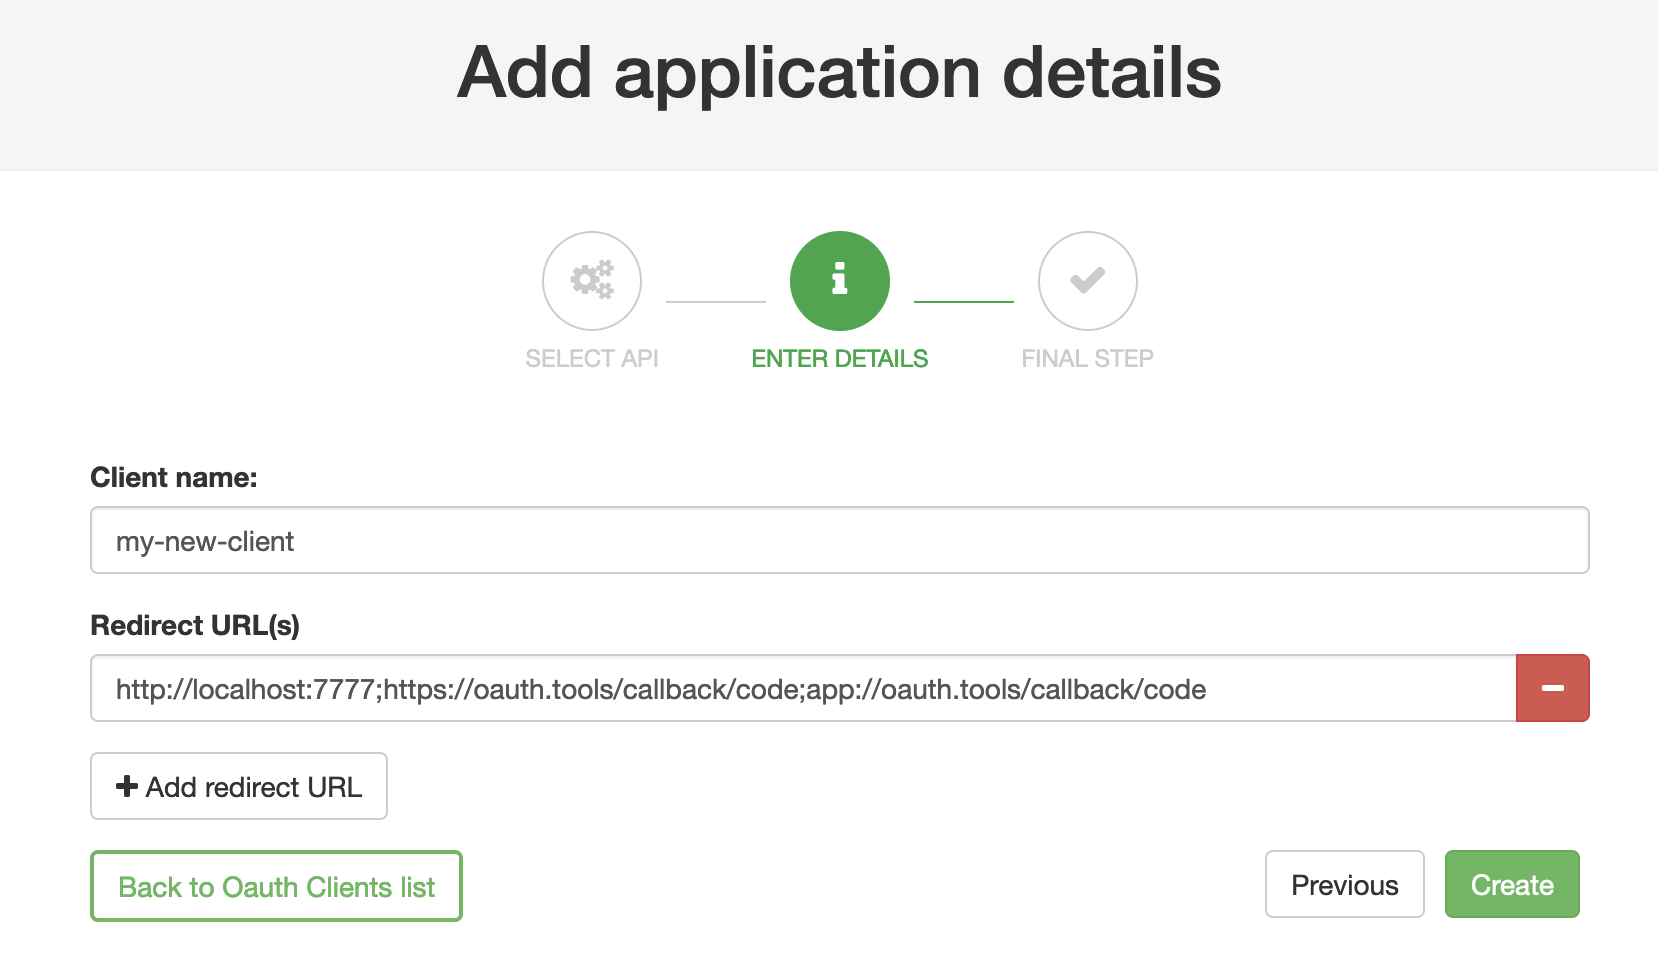
Start by registering a developer by navigating to Portal Management → Developers and add a developer. Then open the Tyk Developer Portal (ex.http://<host>:3000/portal) and open the OAuth clients page. Start the wizard by clicking Create first Oauth Client.;), then click Create.OAuth.ToolsIf using OAuth.tools to obtain a token, make sure to add the appropriate redirect URL. Ex:The web-based version of OAuth.tools using the Code Flow would require
https://oauth.tools/callback/code and the App version of OAuth.tools requires app://oauth.tools/callback/code.Obtain a token using DCR client
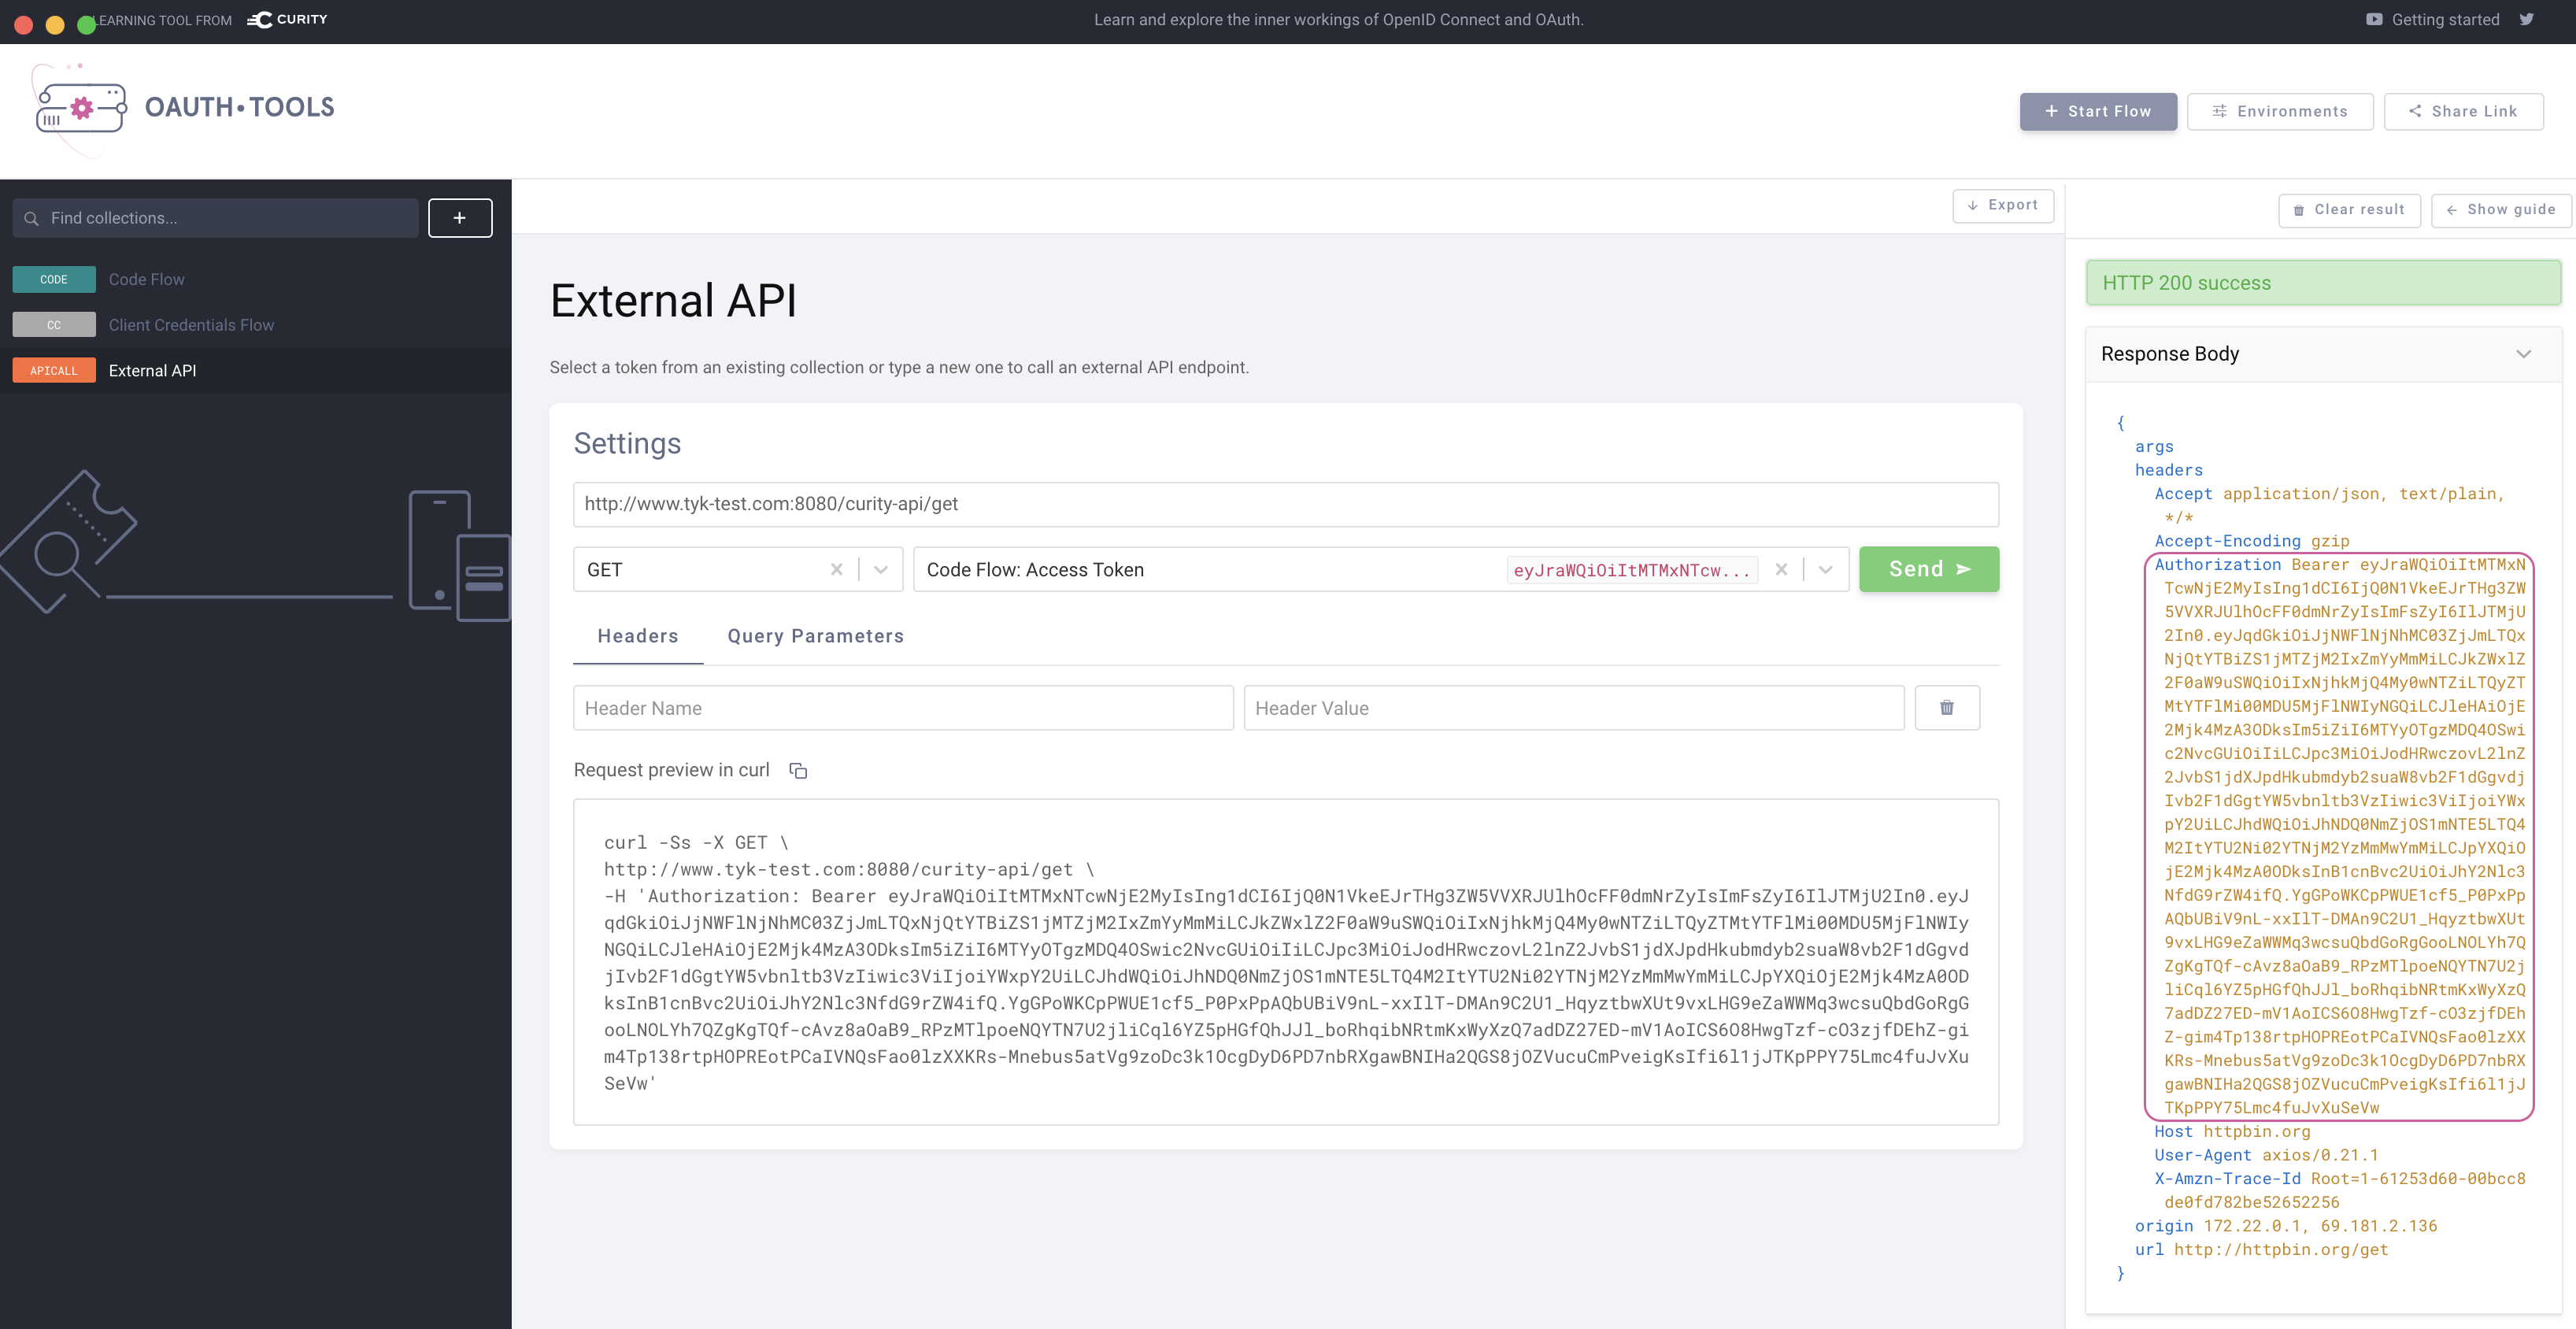
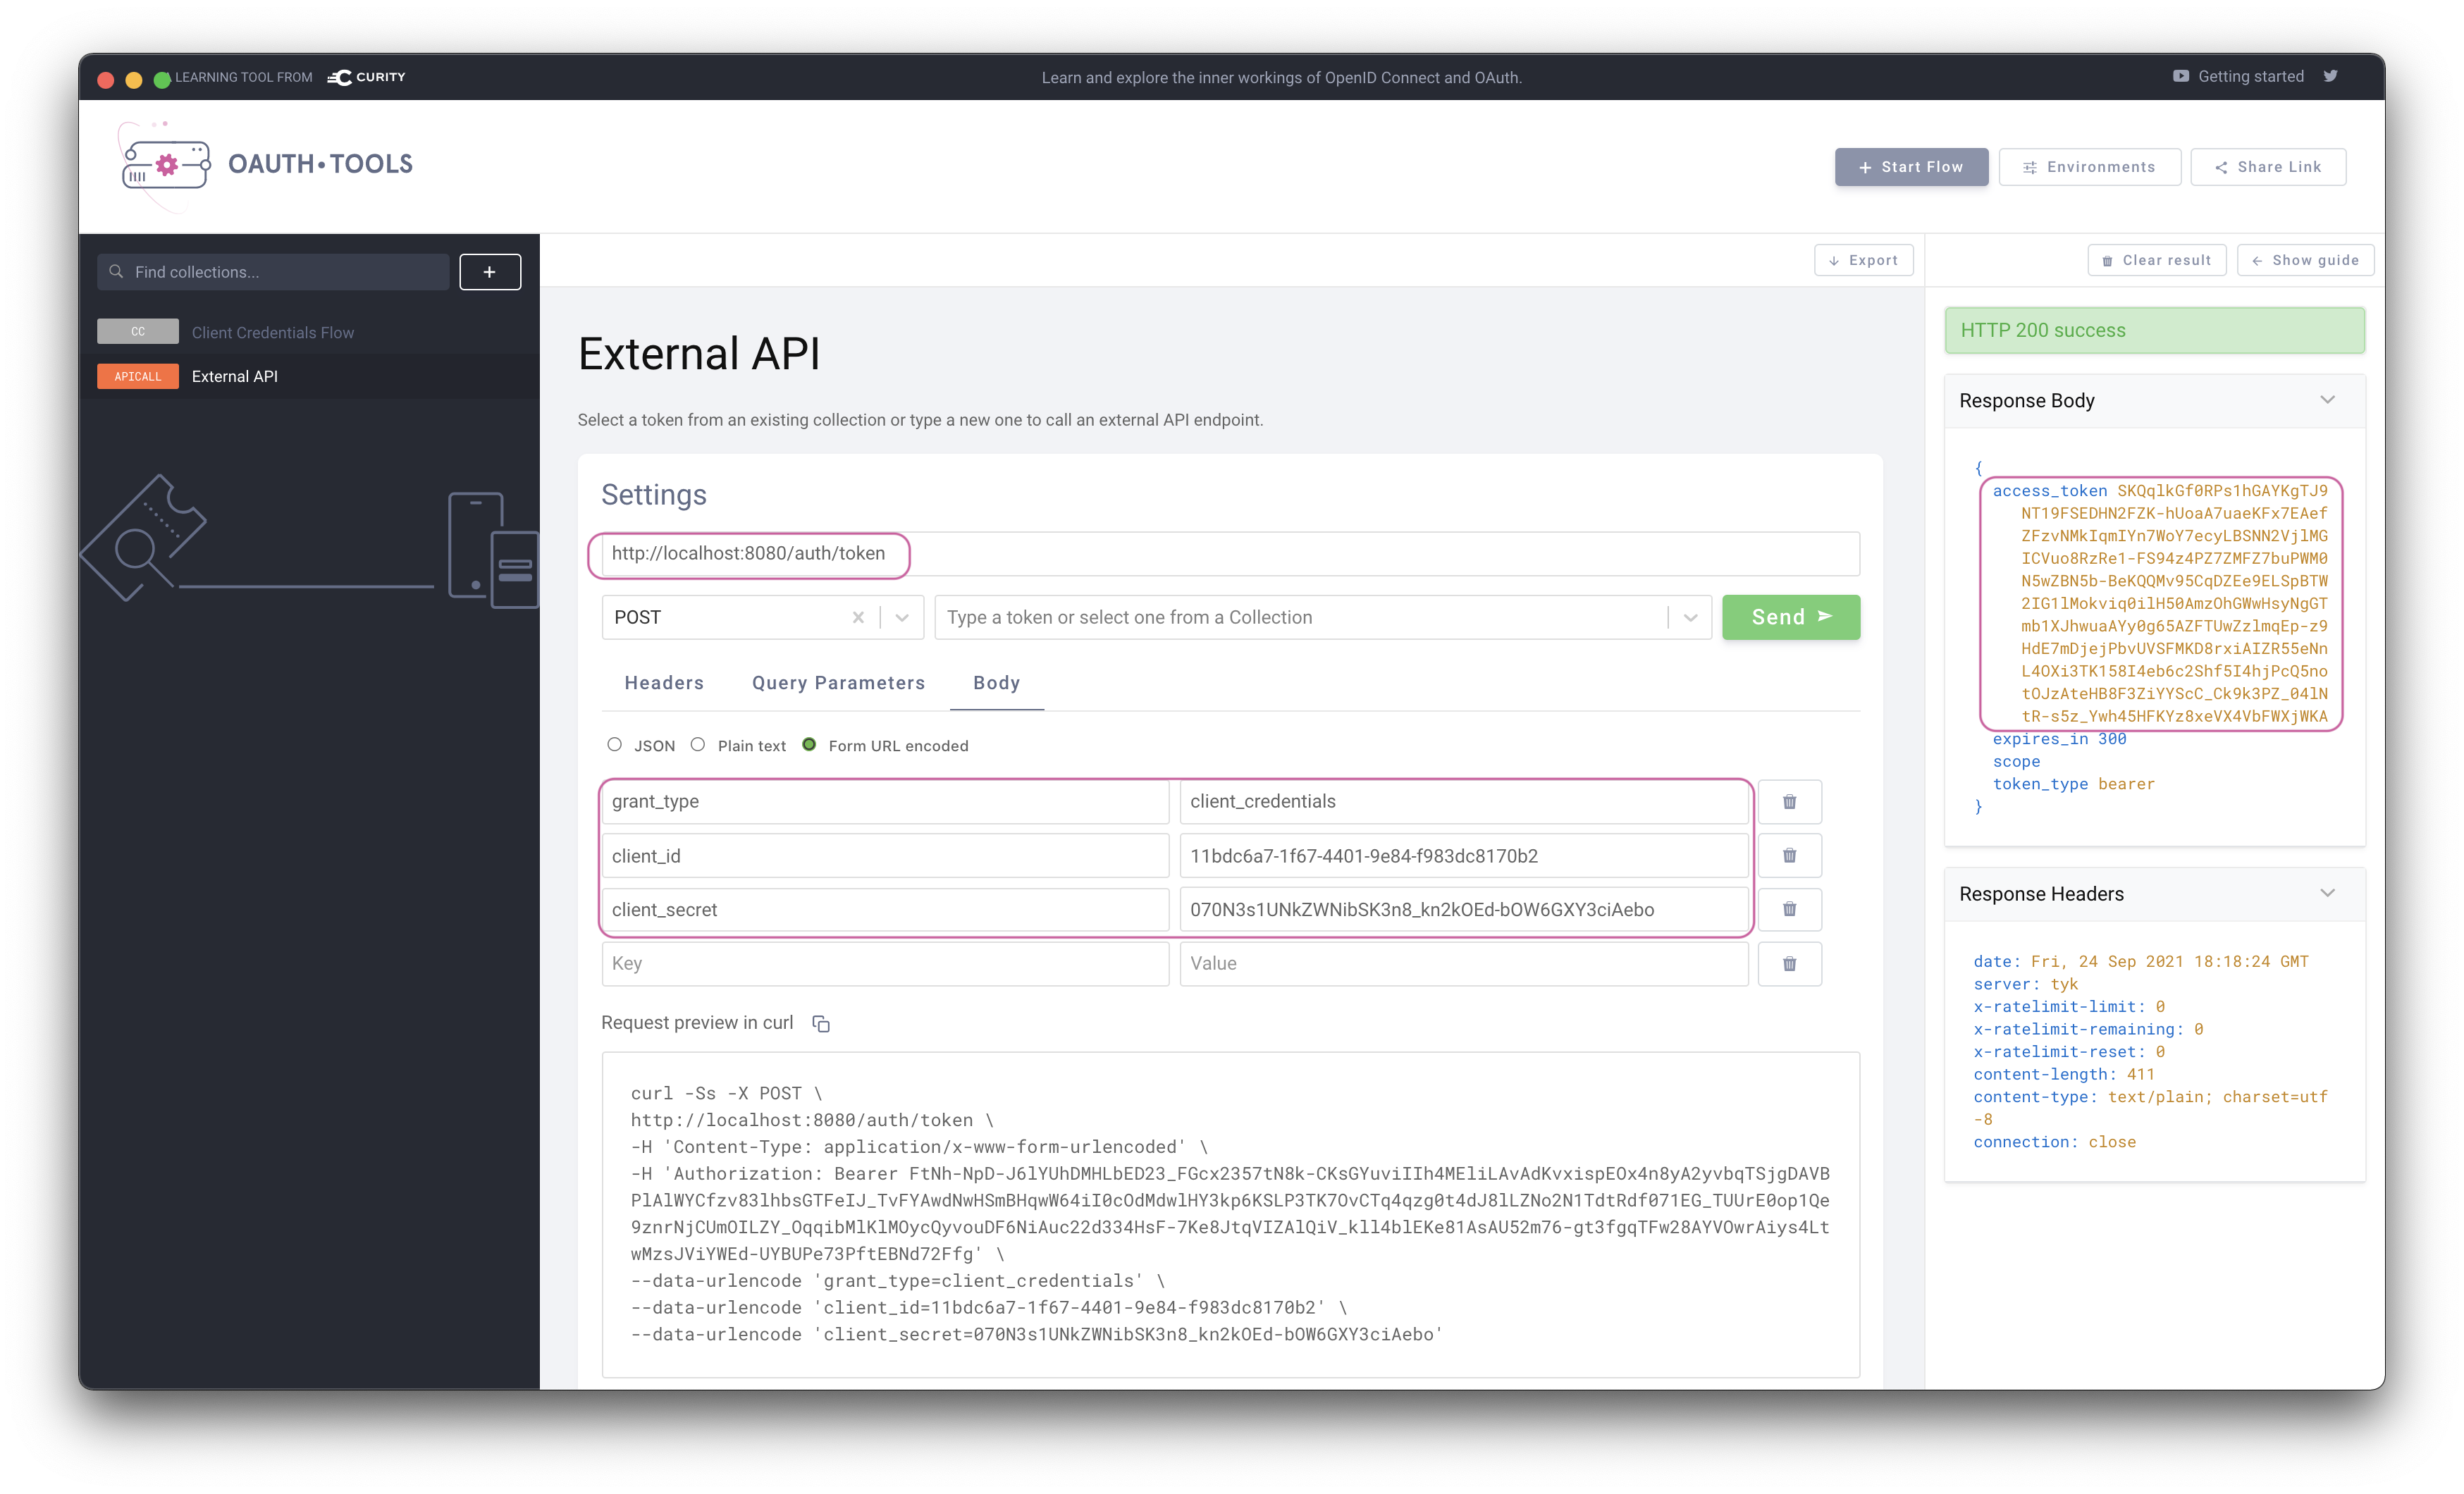
OAuth.tools can be used to obtain an access token from The Curity Identity Server using the DCR information. This call needs to be made to the token endpoint configured on Tyk to handle the Split Token Approach.Start an External API Flow. Copy the Client ID and the Client Secret to the appropriate fields in OAuth.tools. Run the flow to obtain a token.Split TokenNote that the token returned is the signature of a JWT as this is executing the Split Token Approach.
Use token in request to API
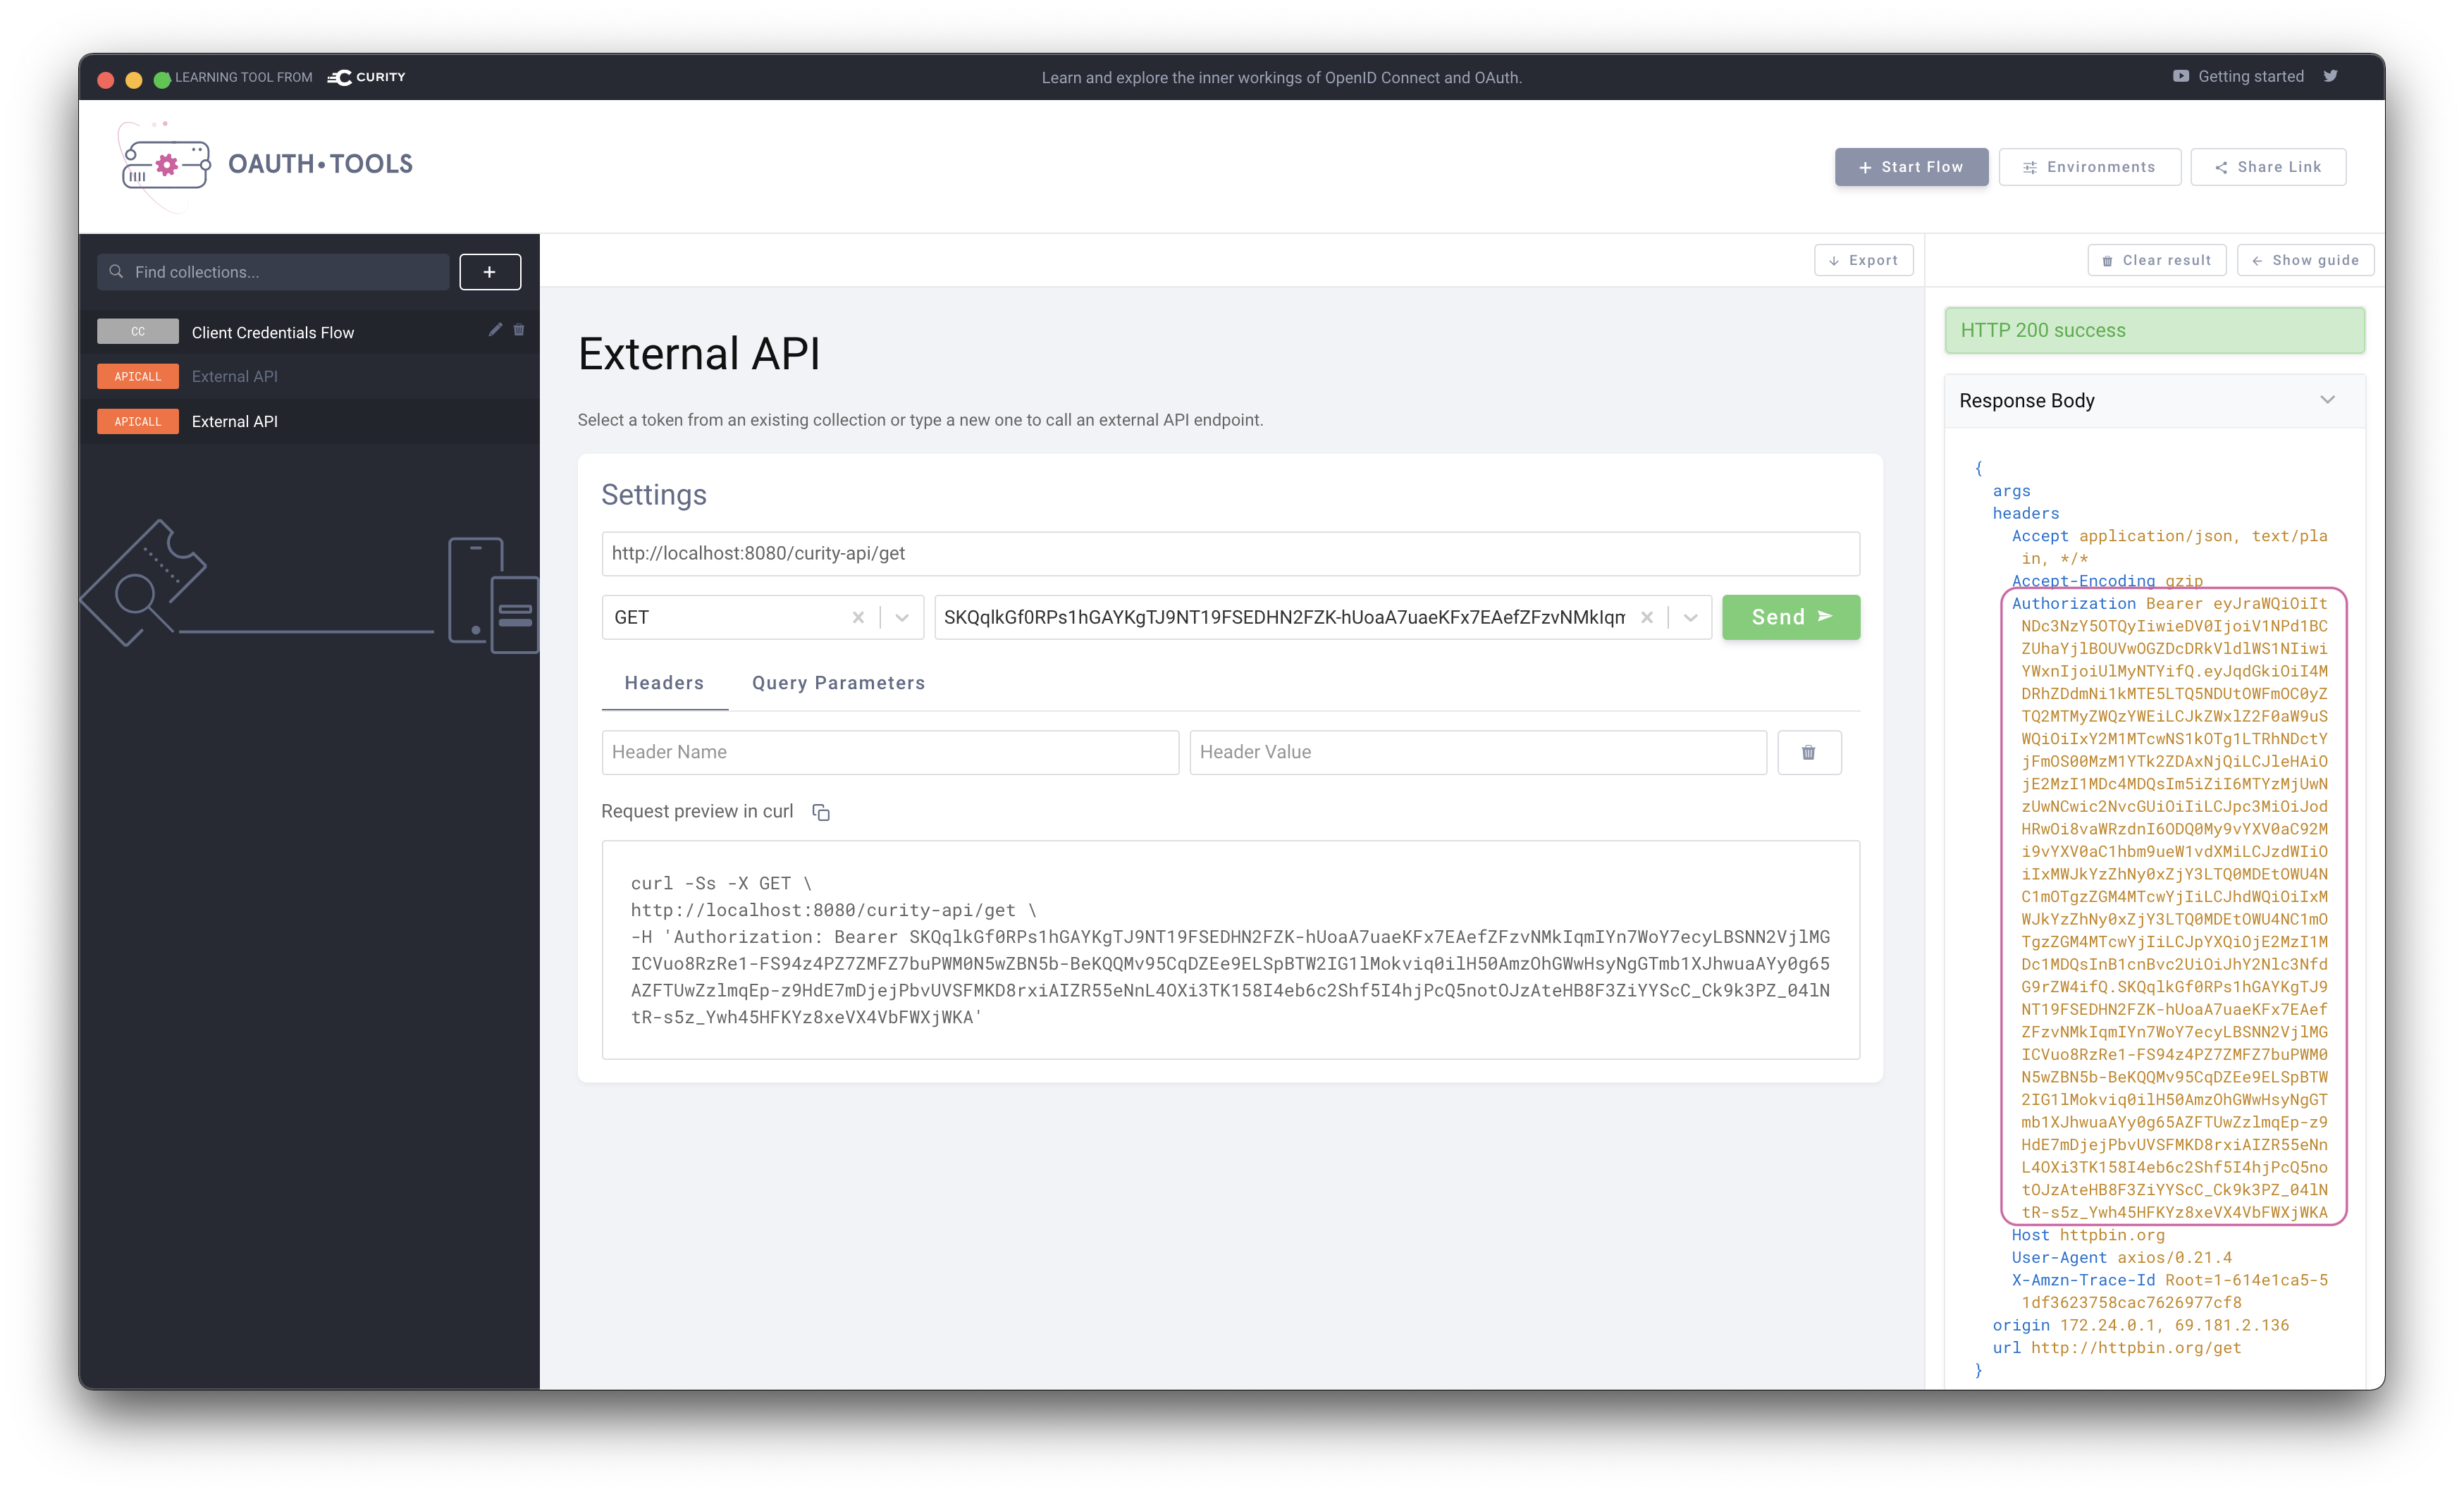
The token can now be used in an External API flow in OAuth.tools to call the API that Tyk is proxying. Tyk will use the signature passed in the Authorization header and lookup the complete JWT in its cache. The complete JWT is then added to the upstream Authorization header as shown in the echo response from Httpbin.org in the below example.